This is the multi-page printable view of this section. Click here to print.
Getting Started
- 1: Setup Guide
- 2: Shooting Guide
- 3: Upgrade Guide
1 - Setup Guide
Requirement Check
Before setting up VirtualLens2, please ensure that the target avatar meets the following requirements:
- It is set up using VRCSDK 3.7.0 or later.
- Modular Avatar 1.8.0 or later is imported into the project.
- Expression Parameters have a margin of at least 8 bits.
Info
Starting from VirtualLens2 v2.10.0, the non-destructive workflow with Modular Avatar has become the standard setup procedure. If you cannot use Modular Avatar for some reason, you can use the traditional setup (destructive setup).Import Modular Avatar
Refer to the Modular Avatar documentation and import Modular Avatar into your project. If it’s already imported, make sure the version is 1.8.0 or later.
![]()
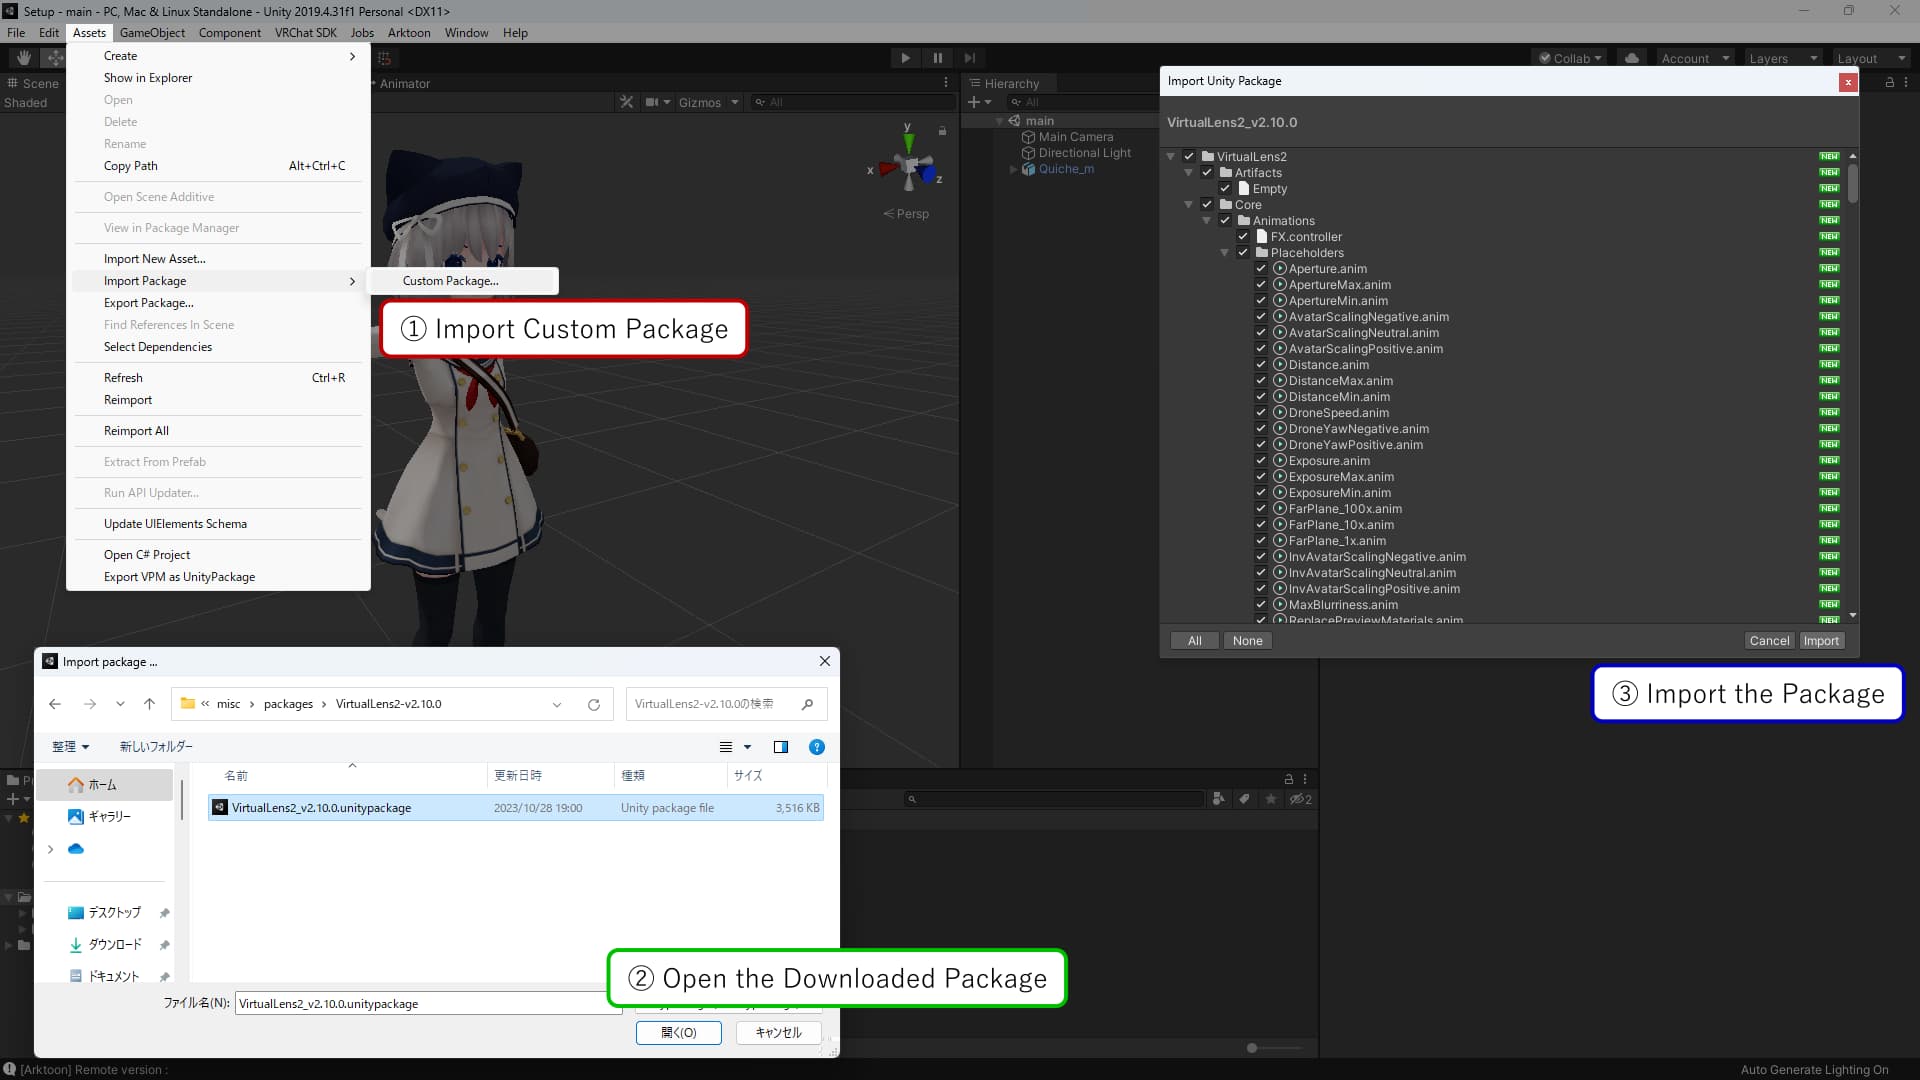
Import Unitypackage File
Import the downloaded package (VirtualLens2_v2.x.x.unitypackage) into your project.

Running Setup Helper
Select the avatar you want to set up, right-click, and choose “VirtualLens2” → “Non-Destructive Setup”. The setup helper will launch, so review the following settings and then press the “Apply” button.
| Avatar | The avatar you want to set up. |
|---|---|
| Target Hand | The hand that will hold the camera. |
| Settings Template | If set, it reads the configuration information from the VirtualLens Settings Prefab. (Optional) |
| Use Custom Model | Check this if you want to use a camera model other than the default. |
| Custom Model Prefab | Specify the Prefab for the camera model you want to place instead of the default model. If not set, the model placement will be skipped. |
| Keep Root Transform | Disables the automatic Transform adjustment feature when placing a custom model. |
Info
If the VRCSDK or Modular Avatar imported into the project is outdated, the menu items may not be displayed here. Please ensure that each package meets the requirements and update them as necessary.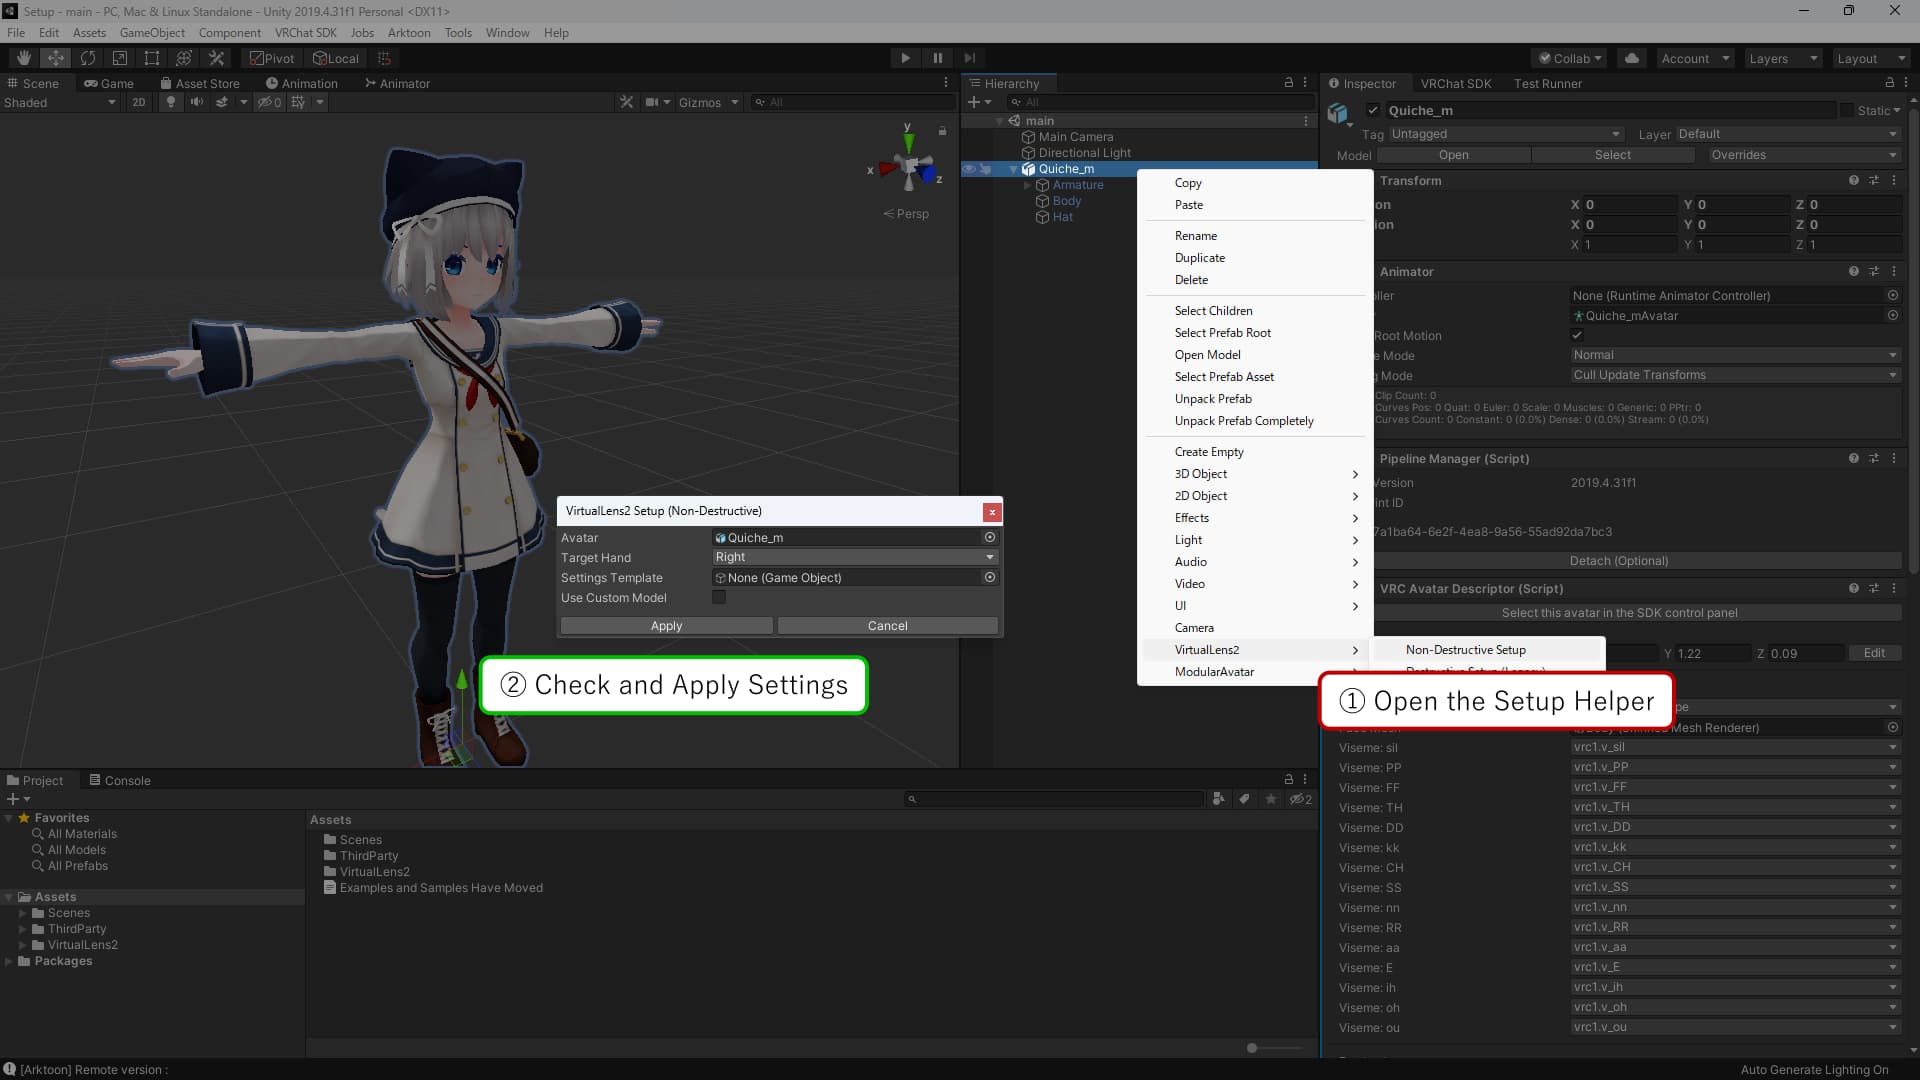
Placing the Camera Model
If the automatic placement of a camera model other than the default doesn’t work, you need to place the model manually. After adding the model to the scene, adjust its position and orientation. Move it to be a child of the bone you want the camera to follow. Additionally, you’ll need to enter information about the model into the VirtualLens Settings component. Refer to the image below and set the information below “Camera Object.”
Tips
If you find documentation for using a camera model with versions of VirtualLens2 prior to v2.5.5, adjust the items to set in “Optional Objects” to “Root Object” and those in “Droppable Objects” to “Non-Preview Root.”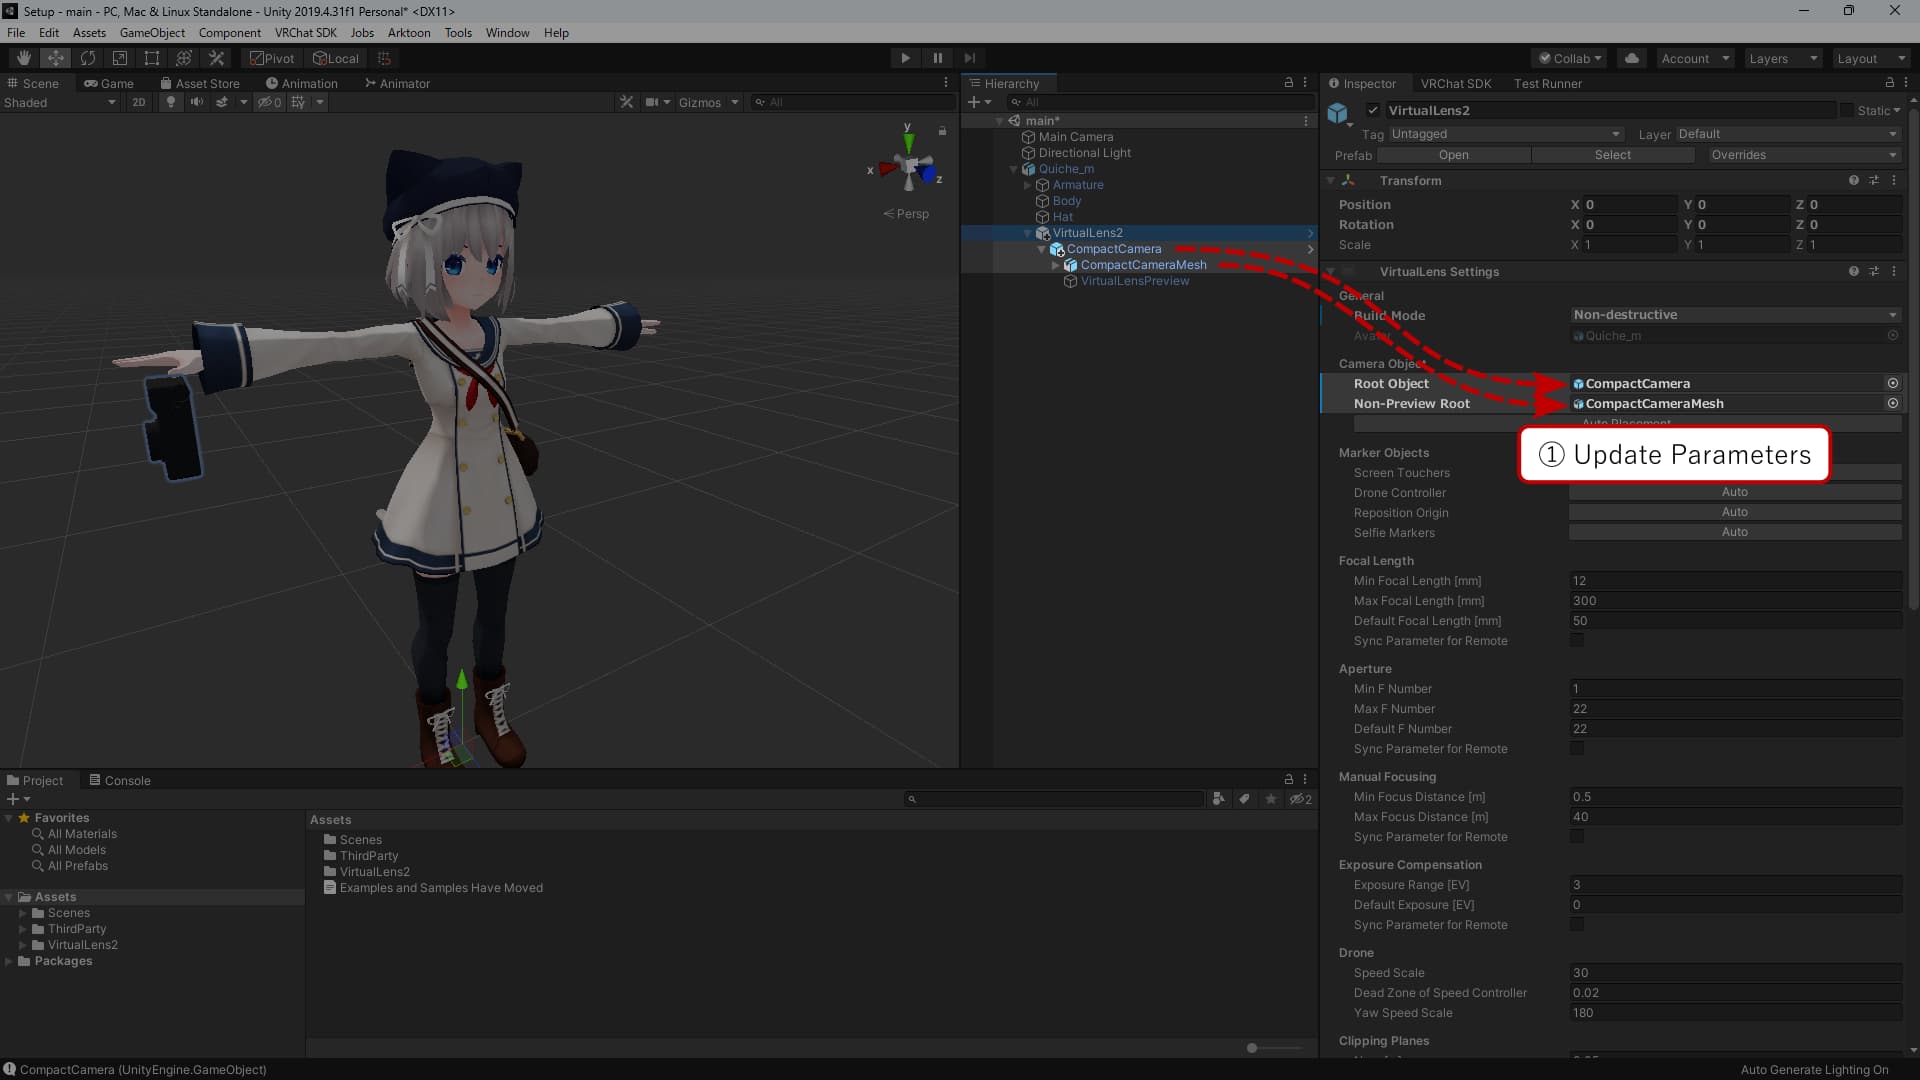
Uploading the Avatar
Now the setup of VirtualLens2 is complete. Upload your avatar and try using it.
Tips
If you want to capture images at resolutions other than FHD (1080p), such as 4K (2160p), consider setting the “Default Resolution" under “Algorithm Settings” in VirtualLens Settings to your preferred resolution.
For more details, please refer to the [High-Resolution Mode](/en/docs/configuration/high-resolution/) page.
2 - Shooting Guide
Basic Usage
Preparing the Built-in Camera
From the menu, go to “Camera” → “Photo Camera” (or “Stream Camera” for video recording) and take out the built-in VRChat camera. If the focus feature is enabled, disable it beforehand to prevent interference.
Launching VirtualLens
-
 VirtualLens2
-
 Enable
Open the action menu and go to “Expressions” → “VirtualLens2” → “Enable” to launch VirtualLens2. While it’s active, the image seen in the built-in camera will be overridden with the one captured by VirtualLens. In this state, you can take and save photos captured by VirtualLens by triggering the shutter on the standard camera.
Tip
For still image photography, it’s advisable to hold the built-in camera with the hand that you won’t use for action menu operations. The camera displayed by VirtualLens2 simply follows the hand, so it’s possible to hold both the built-in camera and the VirtualLens2 camera with the hand that has the camera attached.3 - Upgrade Guide
Basic Steps
Importing the Unitypackage File
Import the Unitypackage file of the latest version that you downloaded (VirtualLens2_v2.x.x.unitypackage) to overwrite.
Reapplying Settings (For Destructive Setup Only)
Press the “Apply” button in the VirtualLens Settings component that was generated during the initial setup to update the data within your avatar.
Tip
This step is not necessary if you used the non-destructive setup. After importing the package, simply re-upload your avatar to apply the updates.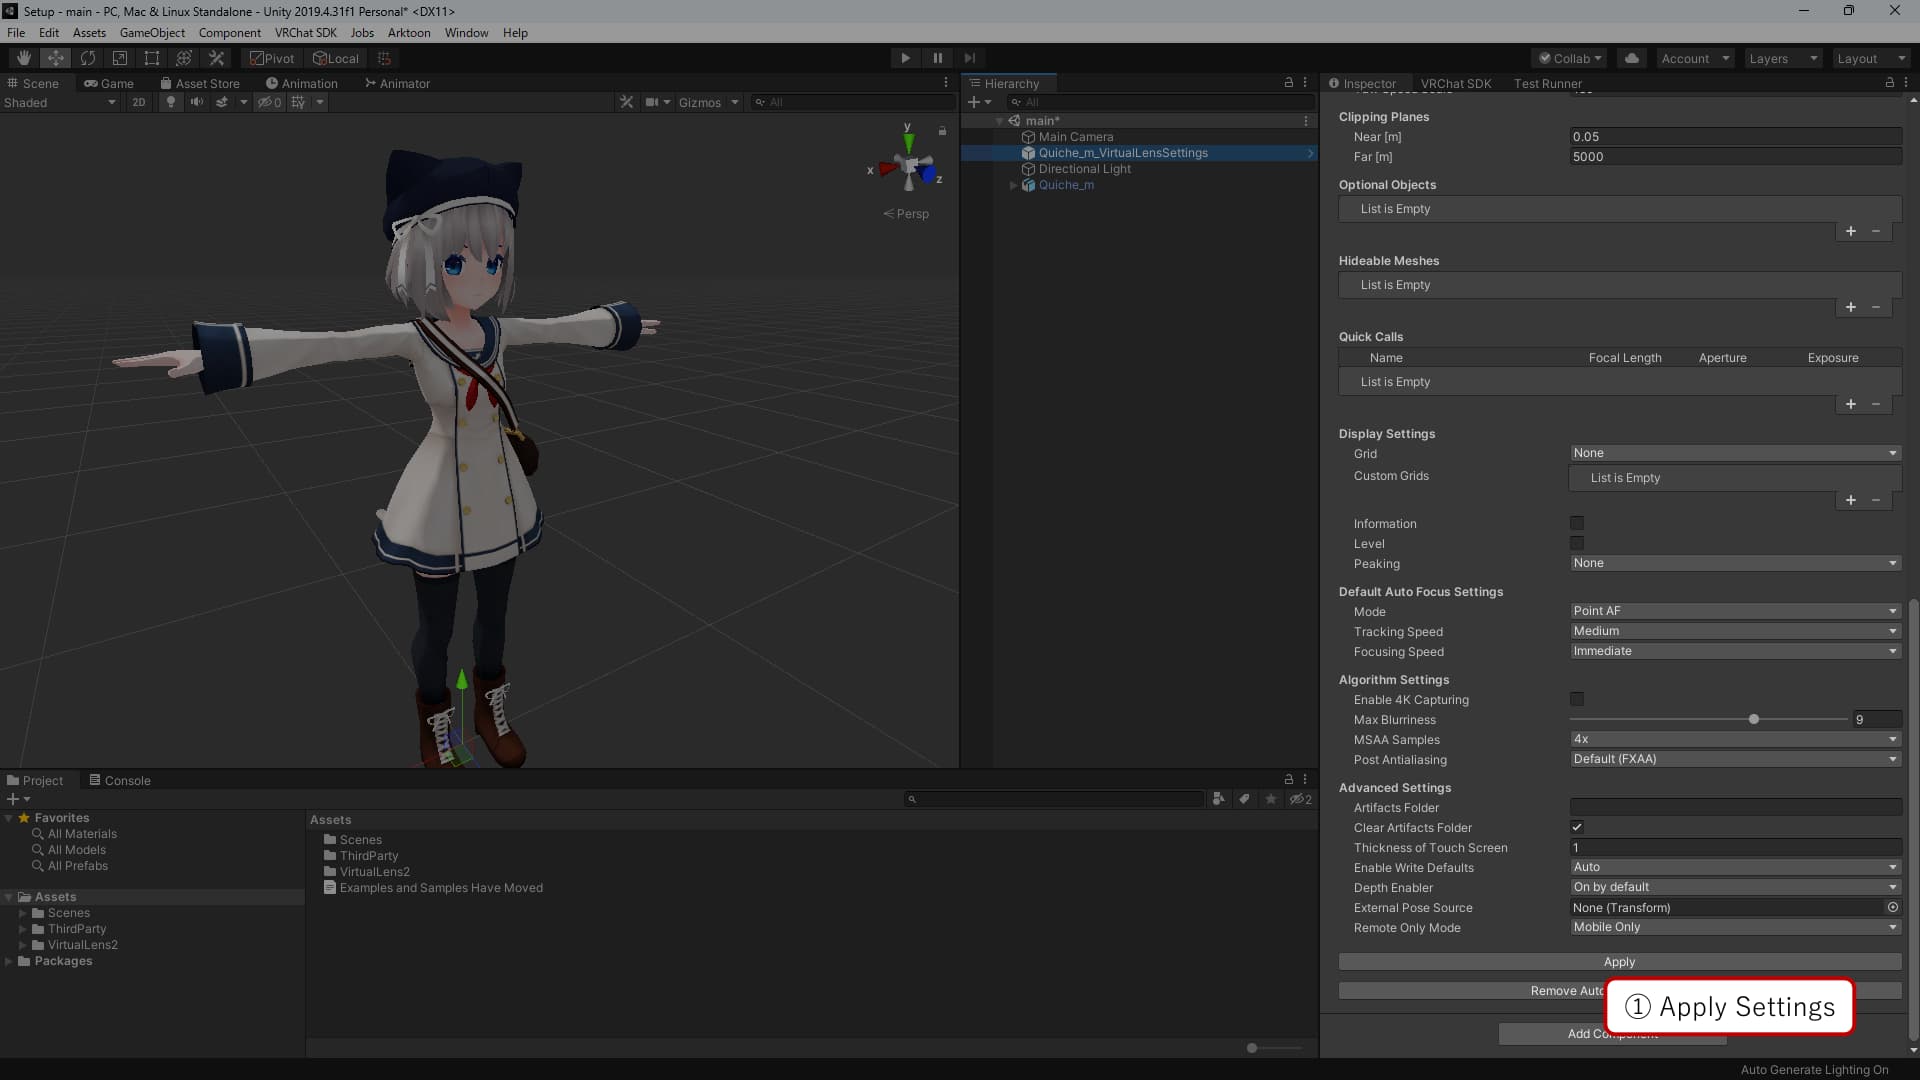
Version-Specific Steps
Updates from v2.10.4 or Earlier
Starting with VirtualLens2 v2.11.0, VRCSDK 3.7.0 or later is required. Additionally, this version of VRCSDK only supports Unity 2022. If your project is currently using Unity 2019, an upgrade to Unity 2022 will be necessary.
Updates from v2.9.9 or Earlier
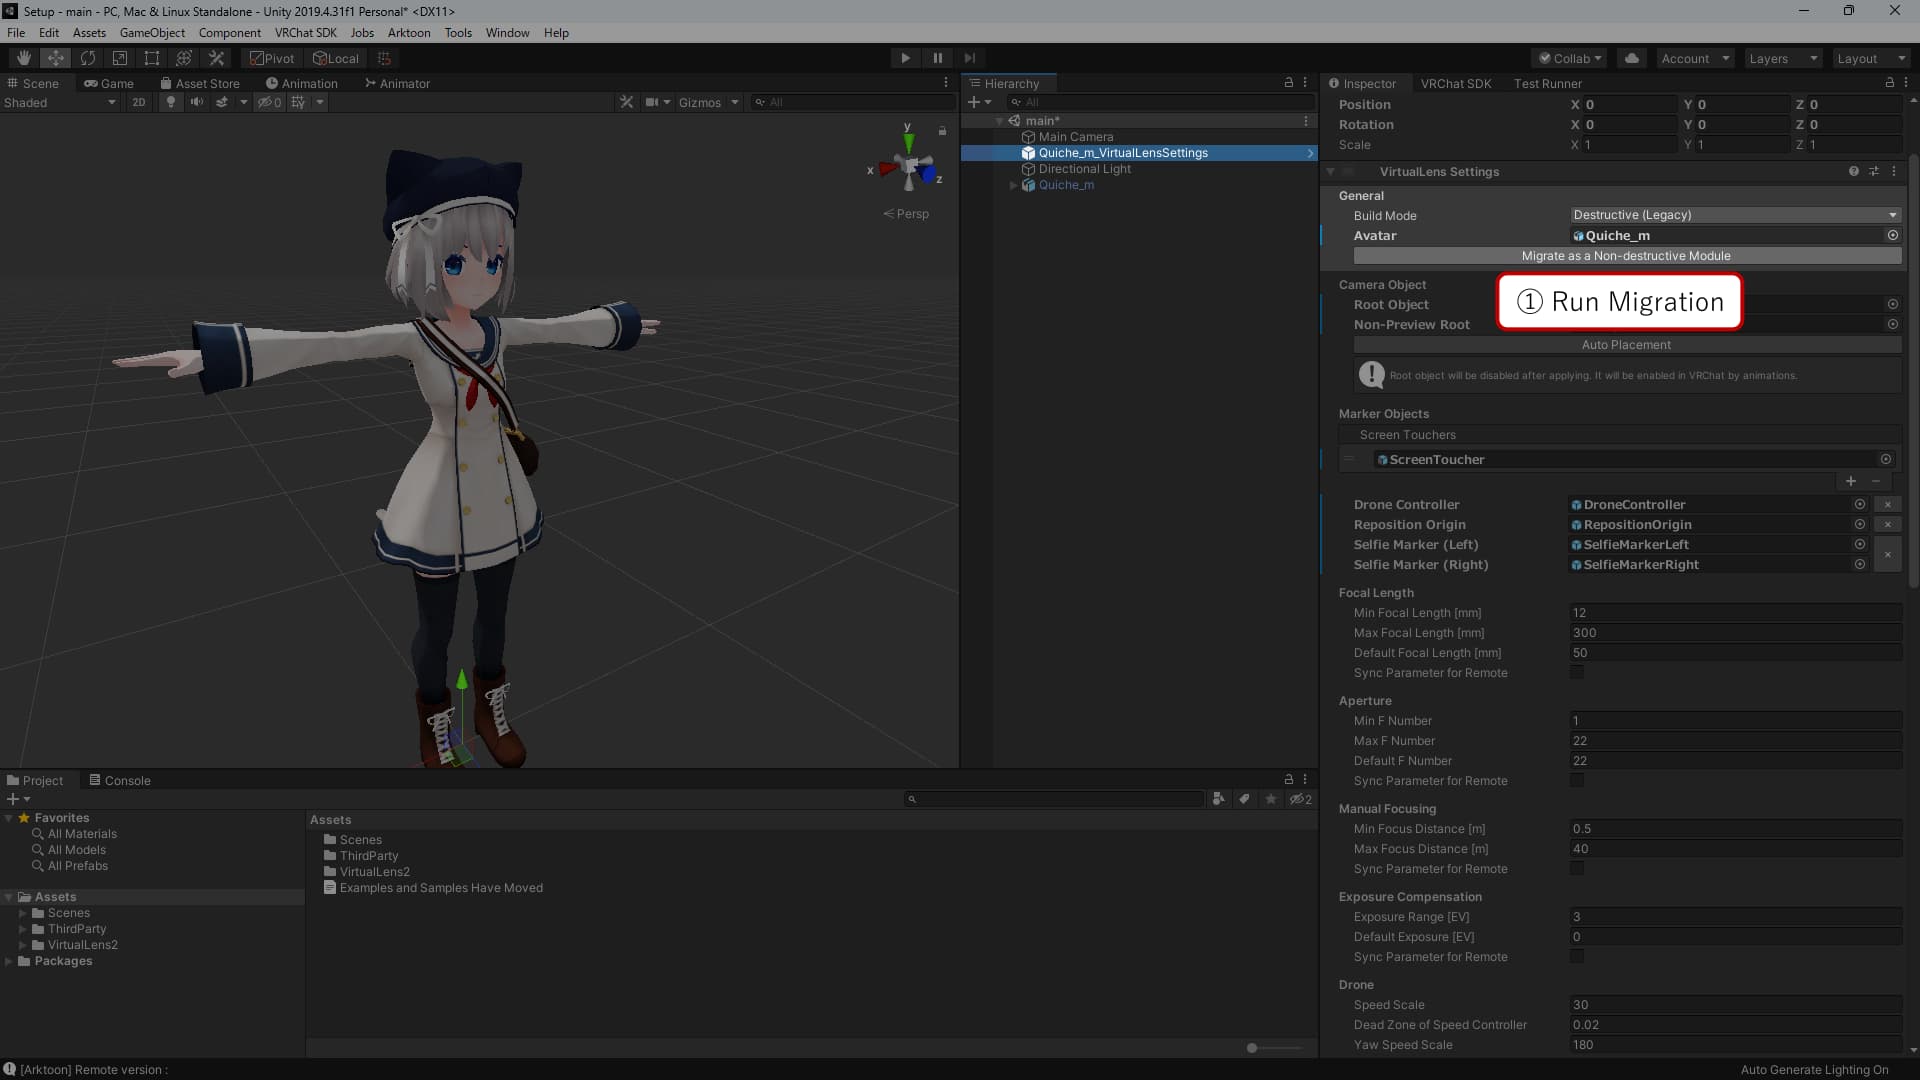
Starting from VirtualLens2 v2.10.0, it is recommended to use the non-destructive setup. If you set up VirtualLens2 with a version earlier than v2.9.9, you can migrate to the non-destructive setup by importing Modular Avatar (version 1.8.0 or later) into your project and pressing the “Migrate as a Non-destructive Module” button in the VirtualLens Settings component.
Once you have migrated to the non-destructive setup, you won’t need to reapply settings for future updates.
Updates from v2.8.5 or Earlier
Starting from VirtualLens2 v2.9.0, default settings are provided through a prefab (VirtualLens2/Prefabs/DefaultSettings.prefab). The settings objects generated automatically by the setup helper in versions earlier than v2.8.5 are not instances of this prefab. To ensure that parameter adjustments in future updates are correctly reflected, it is recommended to replace the current settings objects with instances of the prefab.
To replace the settings objects, press the “Replace by Prefab Instance” button at the bottom of the VirtualLens Settings component to generate instances of the prefab with the current values, as needed.