Destructive Setup Guide (Legacy)
Requirement Check
Before setting up VirtualLens2, please ensure that the target avatar meets the following requirements:
- It is set up using VRCSDK 3.7.0 or later.
- It does not share the following elements with other avatars:
- Animator Controller for the FX Layer
- Avatar mask which referenced by the first layer of the FX layer
- Expressions Menu
- Expression Parameters
- Expression Parameters have a margin of at least 8 bits.
Info
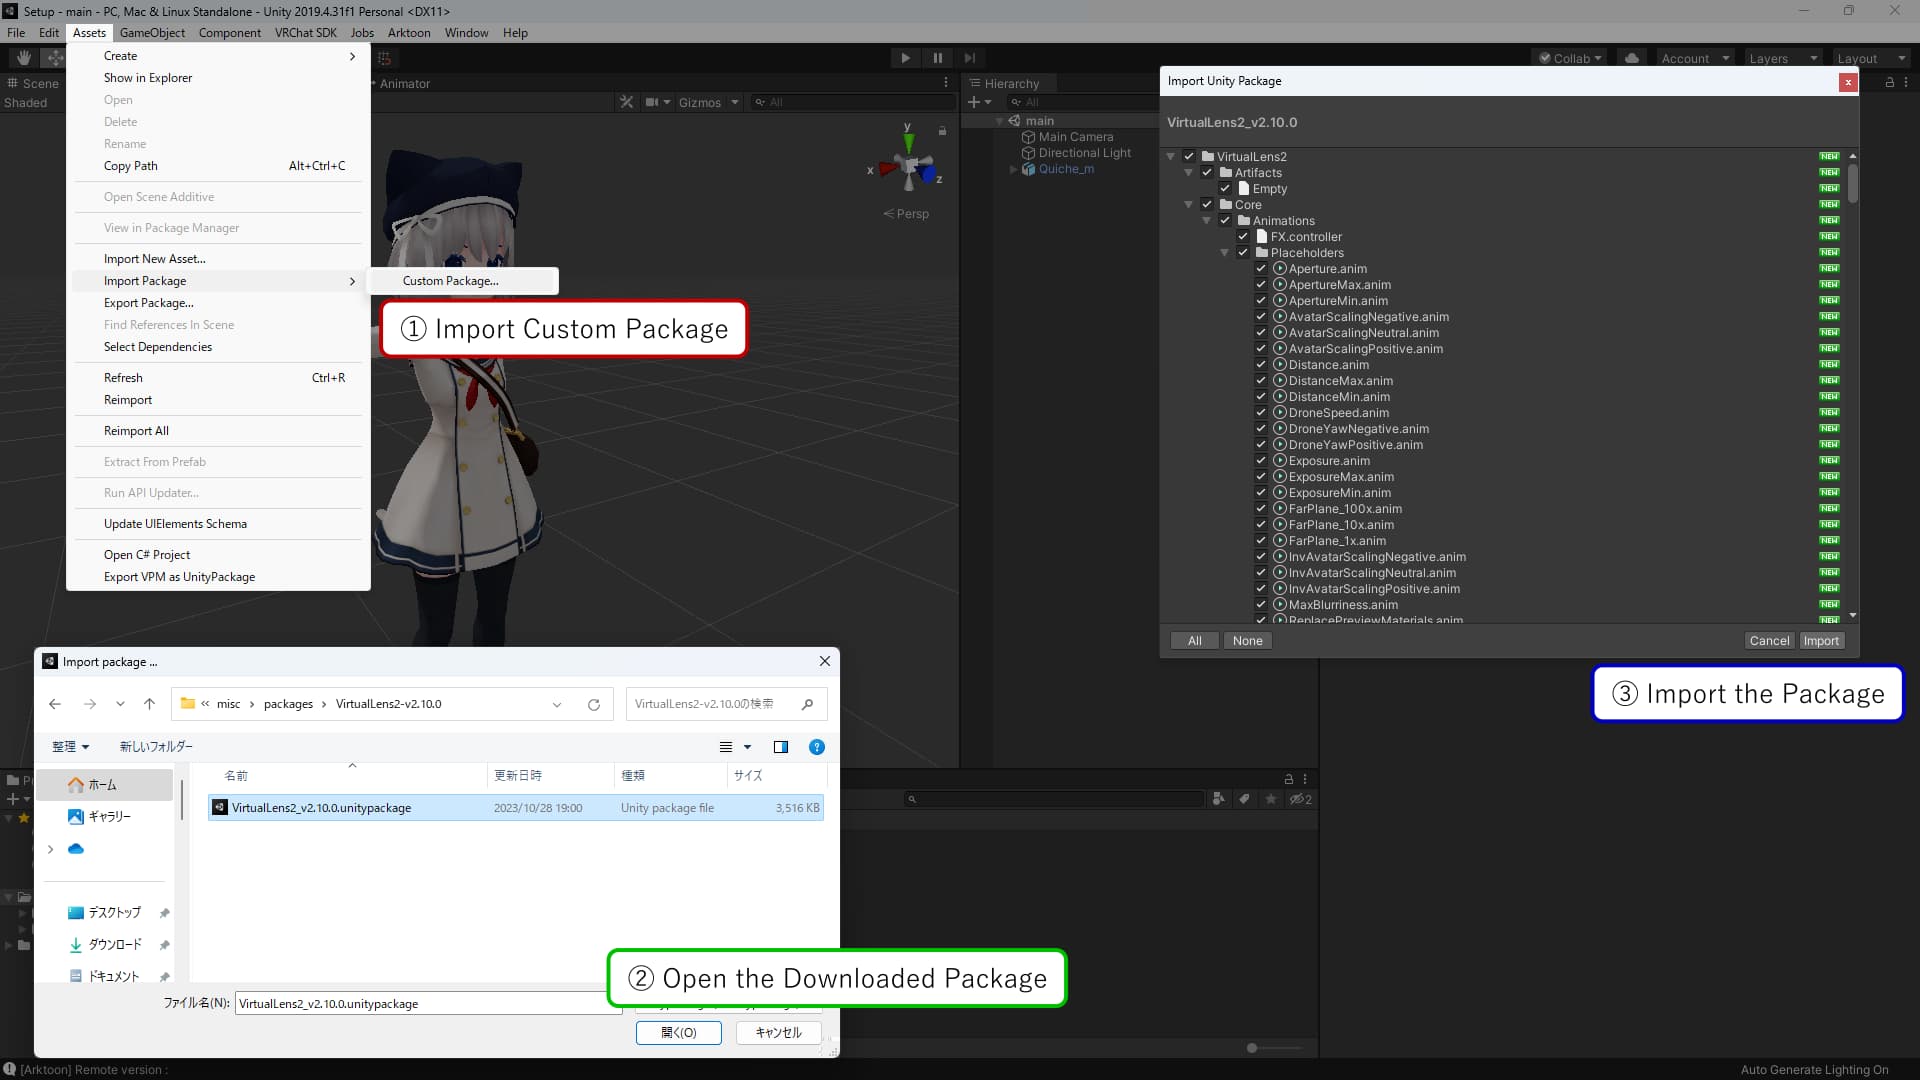
Starting from VirtualLens2 v2.10.0, the non-destructive workflow with Modular Avatar has become the standard setup procedure. Some features are only available with the non-destructive setup, so consider transitioning to it.Import Unitypackage File
Import the downloaded package (VirtualLens2_v2.x.x.unitypackage) into your project.
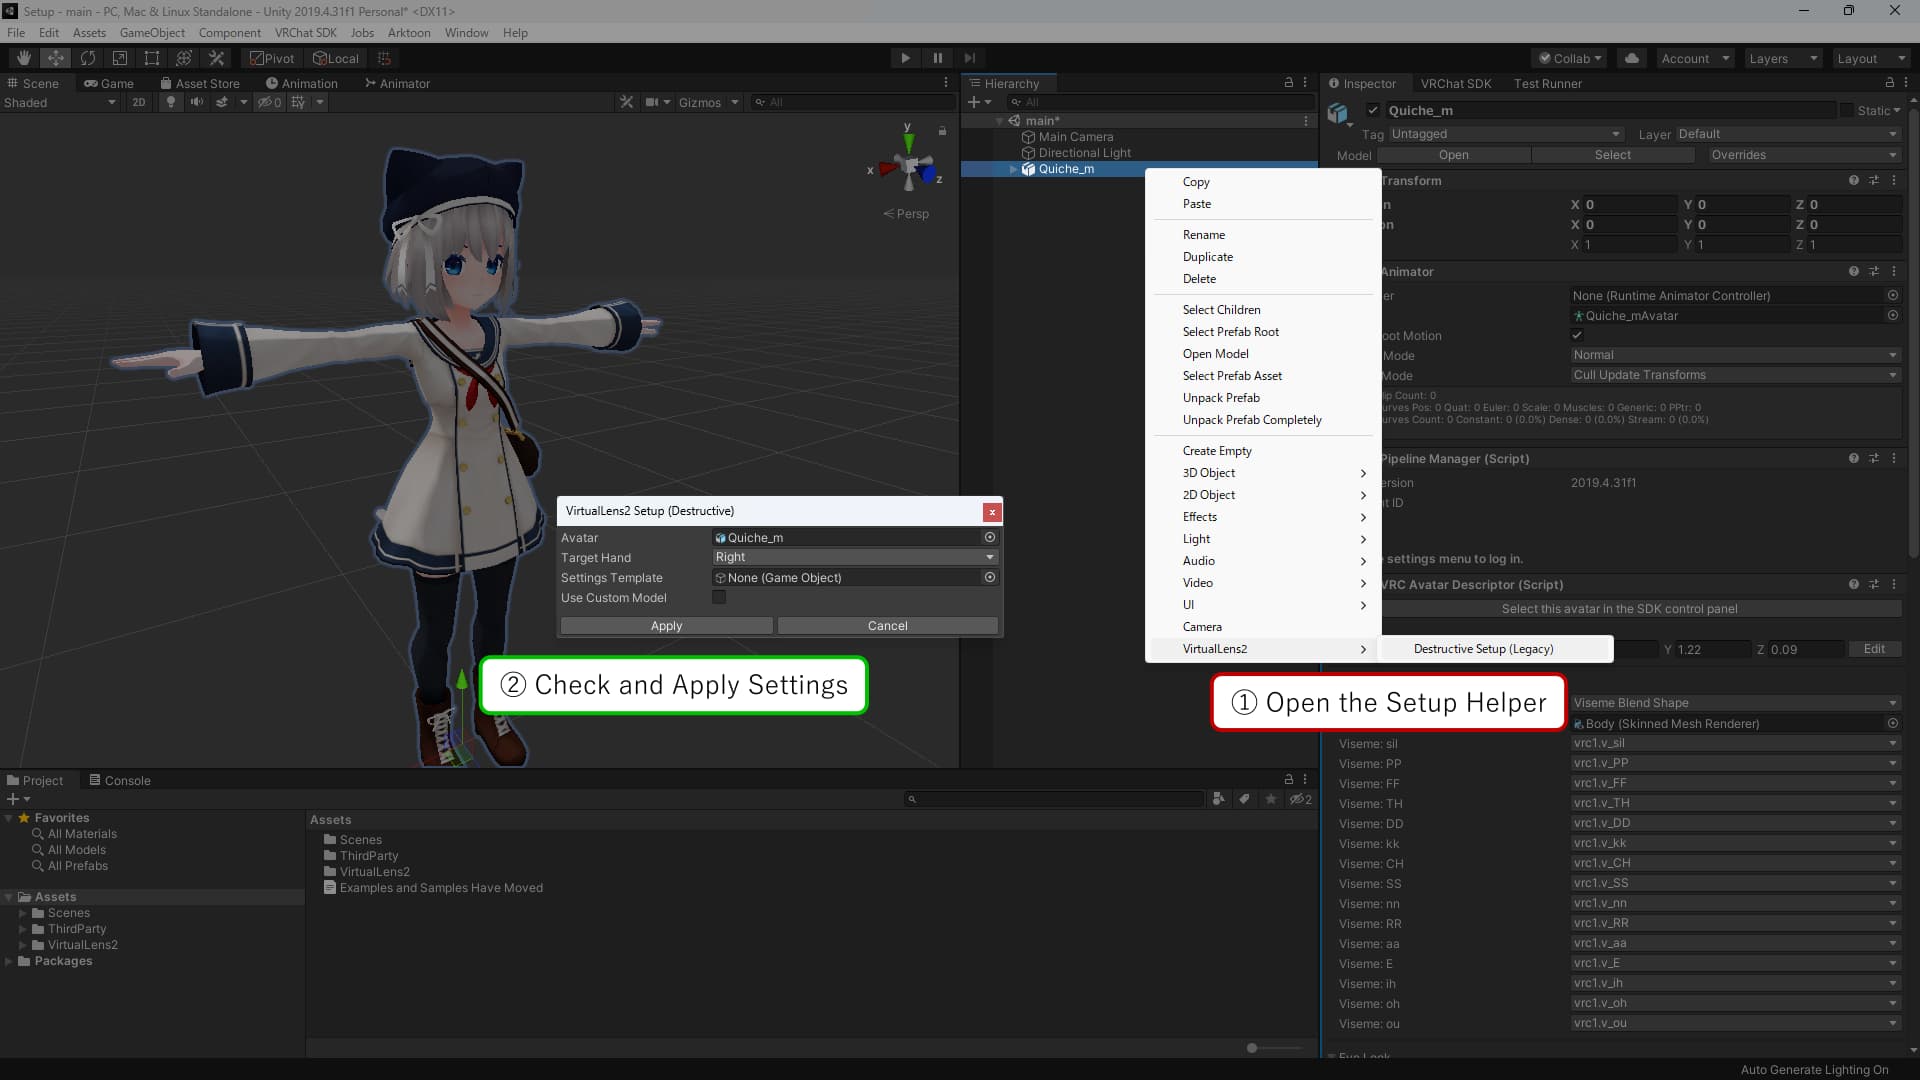
Running Setup Helper
Select the avatar you want to set up, right-click, and choose “VirtualLens2” → “Destructive Setup (Legacy)”. The setup helper will launch, so review the following settings and then press the “Apply” button.
| Avatar | The avatar you want to set up. |
|---|---|
| Target Hand | The hand that will hold the camera. |
| Settings Template | If set, it reads the configuration information from the VirtualLens Settings Prefab. (Optional) |
| Use Custom Model | Check this if you want to use a camera model other than the default. |
| Custom Model Prefab | Specify the Prefab for the camera model you want to place instead of the default model. If not set, the model placement will be skipped. |
| Keep Root Transform | Disables the automatic Transform adjustment feature when placing a custom model. |
Placing the Camera Model
If the automatic placement of a camera model other than the default doesn’t work, you need to place the model manually. After adding the model to the scene, adjust its position and orientation. Move it to be a child of the bone you want the camera to follow. Additionally, you’ll need to enter information about the model into the VirtualLens Settings component. Refer to the image below and set the information below “Camera Object.”
Tips
If you find documentation for using a camera model with versions of VirtualLens2 prior to v2.5.5, adjust the items to set in “Optional Objects” to “Root Object” and those in “Droppable Objects” to “Non-Preview Root.”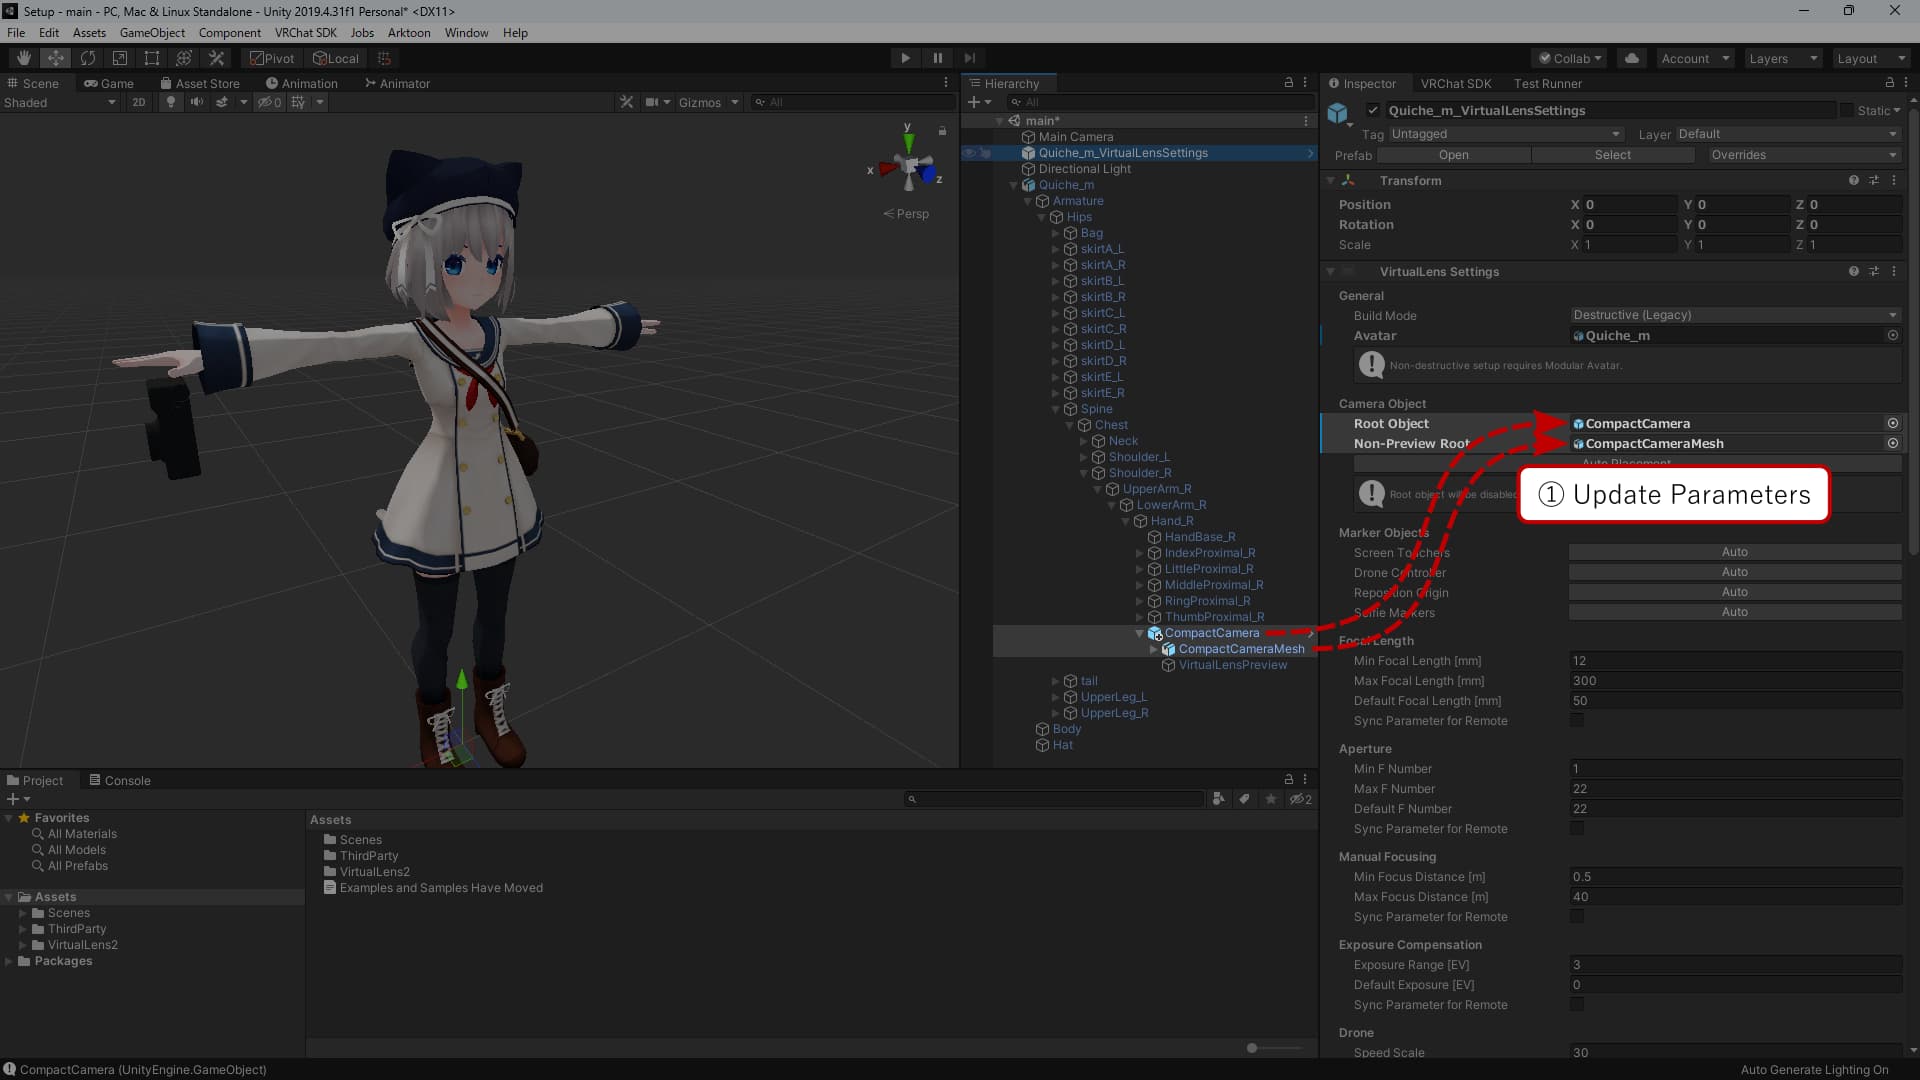
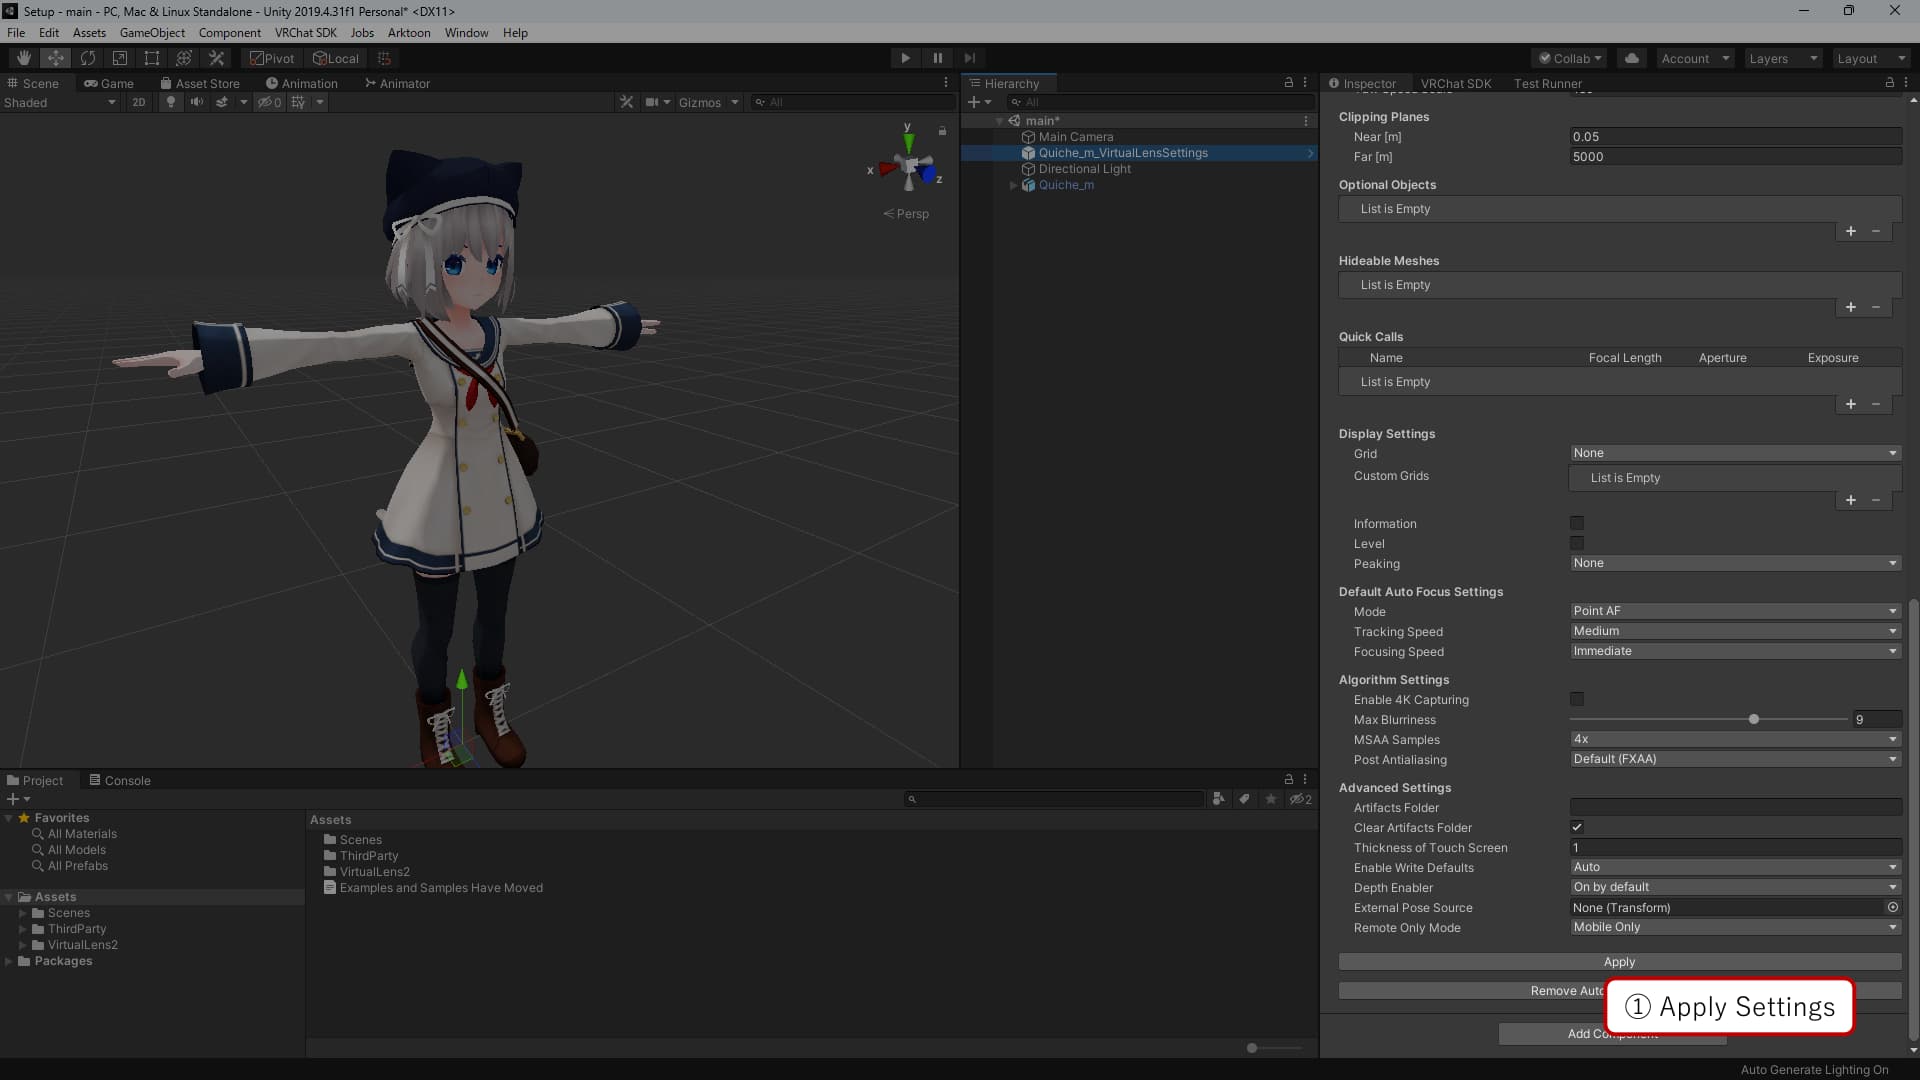
Check and Apply Settings
Check the settings of the automatically generated VirtualLens Settings component, and if there are no issues, press the “Apply” button to apply the changes to the avatar.
Tips
If you want to capture images at resolutions other than FHD (1080p), such as 4K (2160p), consider setting the “Default Resolution" under “Algorithm Settings” in VirtualLens Settings to your preferred resolution.
For more details, please refer to the [High-Resolution Mode](/en/docs/configuration/high-resolution/) page.
Uploading the Avatar
Now the setup of VirtualLens2 is complete. Upload your avatar and try using it.
Important Notes
About Automatically Edited Files
In a destructive setup, some files associated with the target avatar are edited during the application of settings. Be cautious not to make changes that may conflict with these edited files. Also, if these files are shared among multiple avatars, make sure they are copied in advance to avoid issues when the files are edited.
FX Layer Animator Controller
- Layers with names starting with
VirtualLens2are temporarily removed. - Parameters with names starting with
VirtualLens2are temporarily removed. - Necessary layers and parameters are added.
Expressions Menu
- The sub-menu
VirtualLens2is temporarily removed. - A newly generated sub-menu
VirtualLens2is added.
Expression Parameters
- Parameters with names starting with
VirtualLens2are temporarily removed. - Necessary parameters are added.
Handling of Automatically Generated Files
Files generated automatically during the setup of VirtualLens2 are, by default, deleted upon reapplication. Therefore, be cautious not to directly edit the automatically generated files.