Replacing the Camera Model
Using VirtualLens2-Compatible Prefabs
If the package of the 3D model you want to use includes VirtualLens2-compatible prefabs, please refer to the documentation provided with the model data and setup guide. If the Prefab contains objects named VirtualLensOrigin and VirtualLensPreview, it is likely compatible with VirtualLens2.
Simple Replacement Procedure
Here, we’ll explain the procedure for displaying a 3D model as a camera when there are no VirtualLens2-compatible prefabs or setup instructions available. If you wish to create a prefab for sharing with other avatars or distribute a pre-configured mesh, please refer to the more detailed instructions below.
Preparations
If there is a default camera model, remove CompactCamera from the Hierarchy.
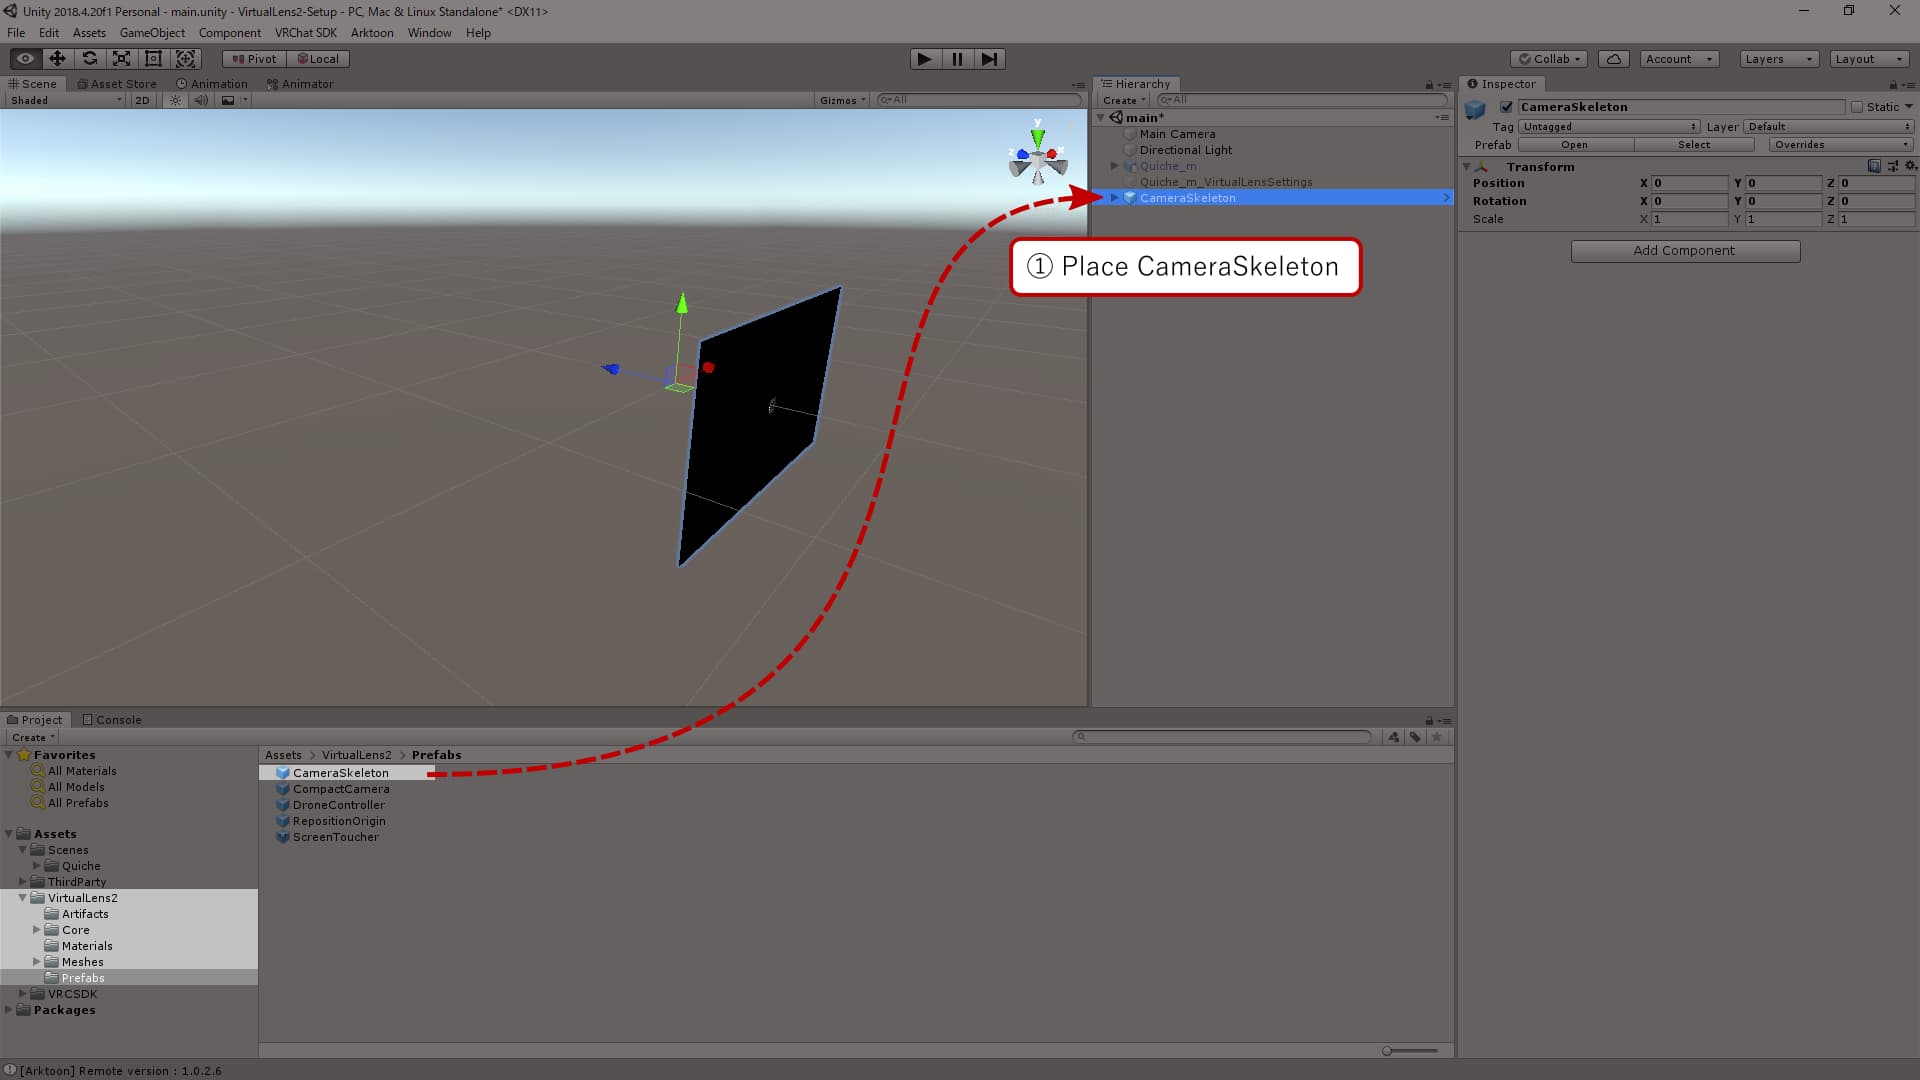
Placing the Template Prefab
Add VirtualLens2/Prefabs/CameraSkeleton.prefab to the scene.
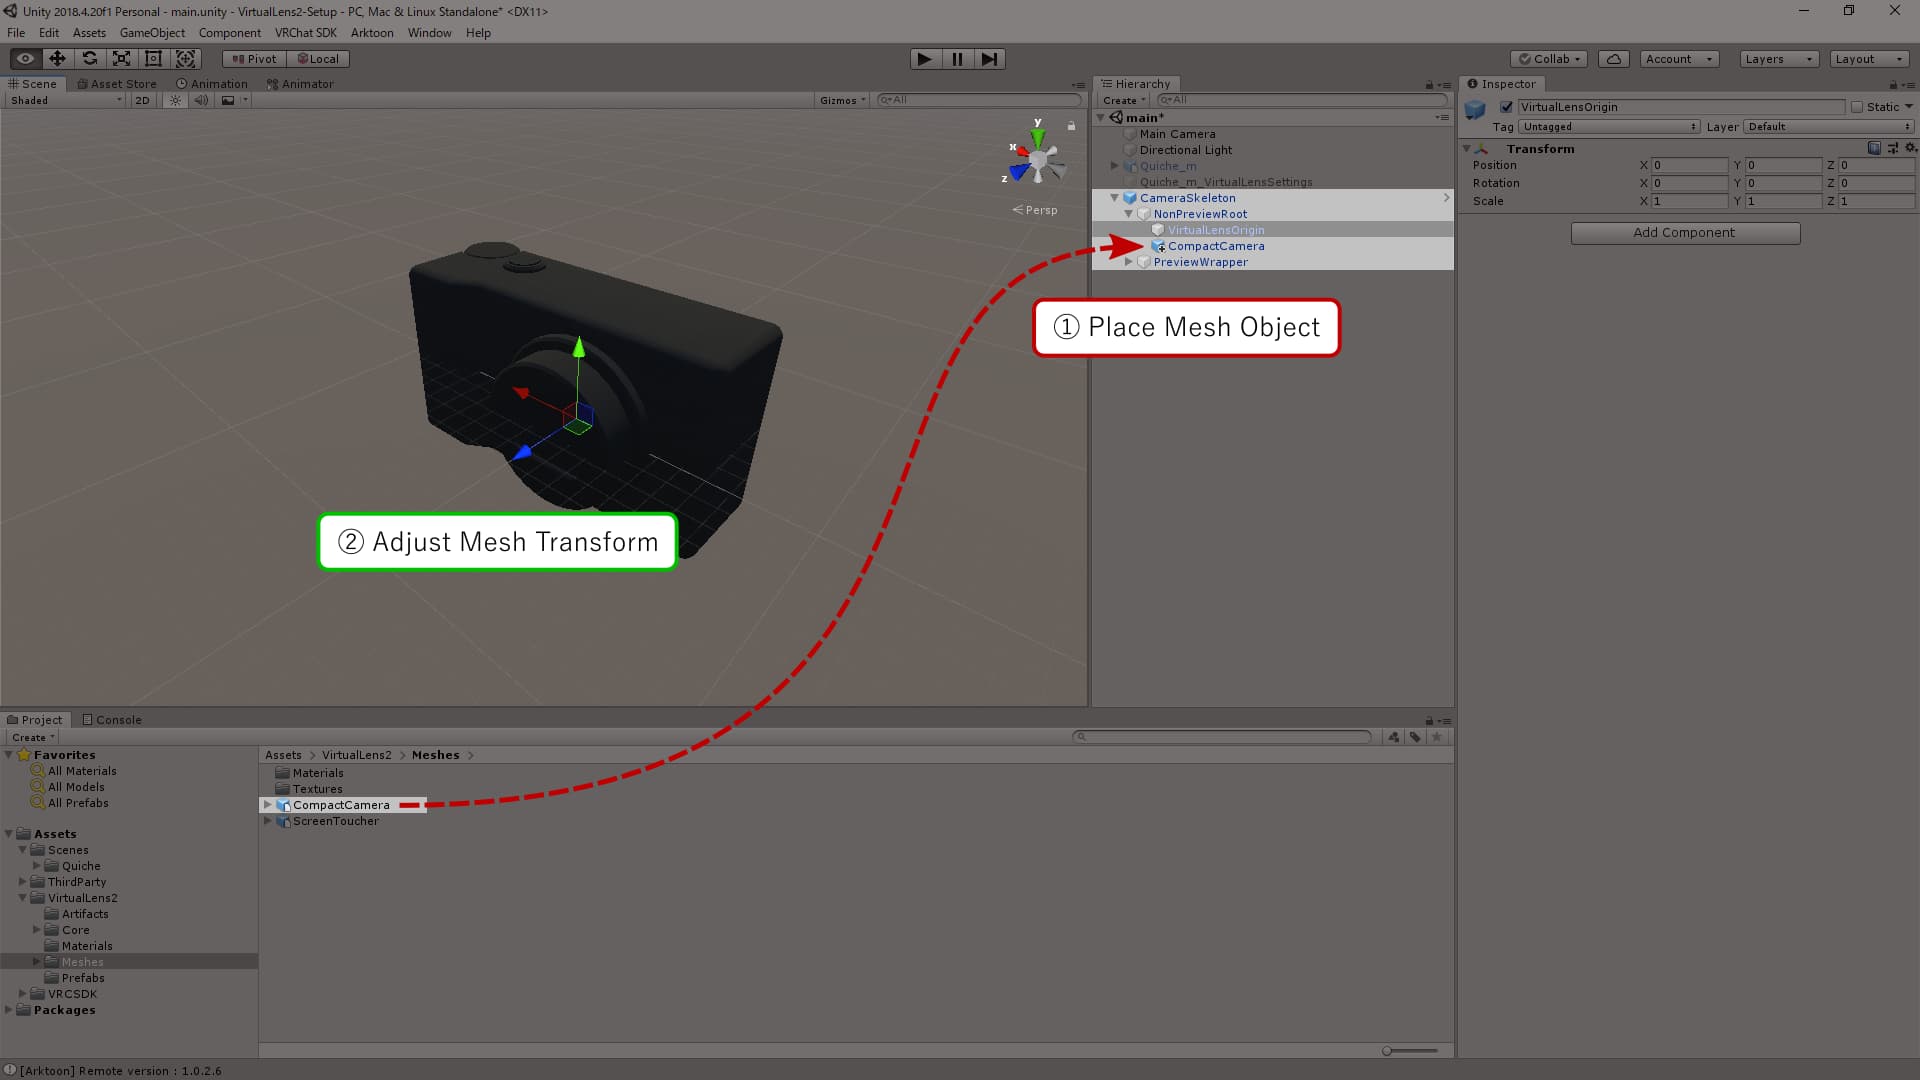
Placing Custom Mesh
Place the mesh you want to use as a child of NonPreviewRoot. Since the camera captures from the position of VirtualLensOrigin, adjust the position of VirtualLensOrigin to be at the center of the lens or as needed. Also, be careful that no visible polygons are more than 0.05m away from the line of sight (positive Z-axis direction) from VirtualLensOrigin as this could cause reflections in the camera mesh.
Adjusting the Preview Screen Position
Adjust the position and size of the preview screen, including the touch screen PreviewWrapper. When doing this, make sure to set the Scale values (x, y, z) to the same value to maintain the aspect ratio.

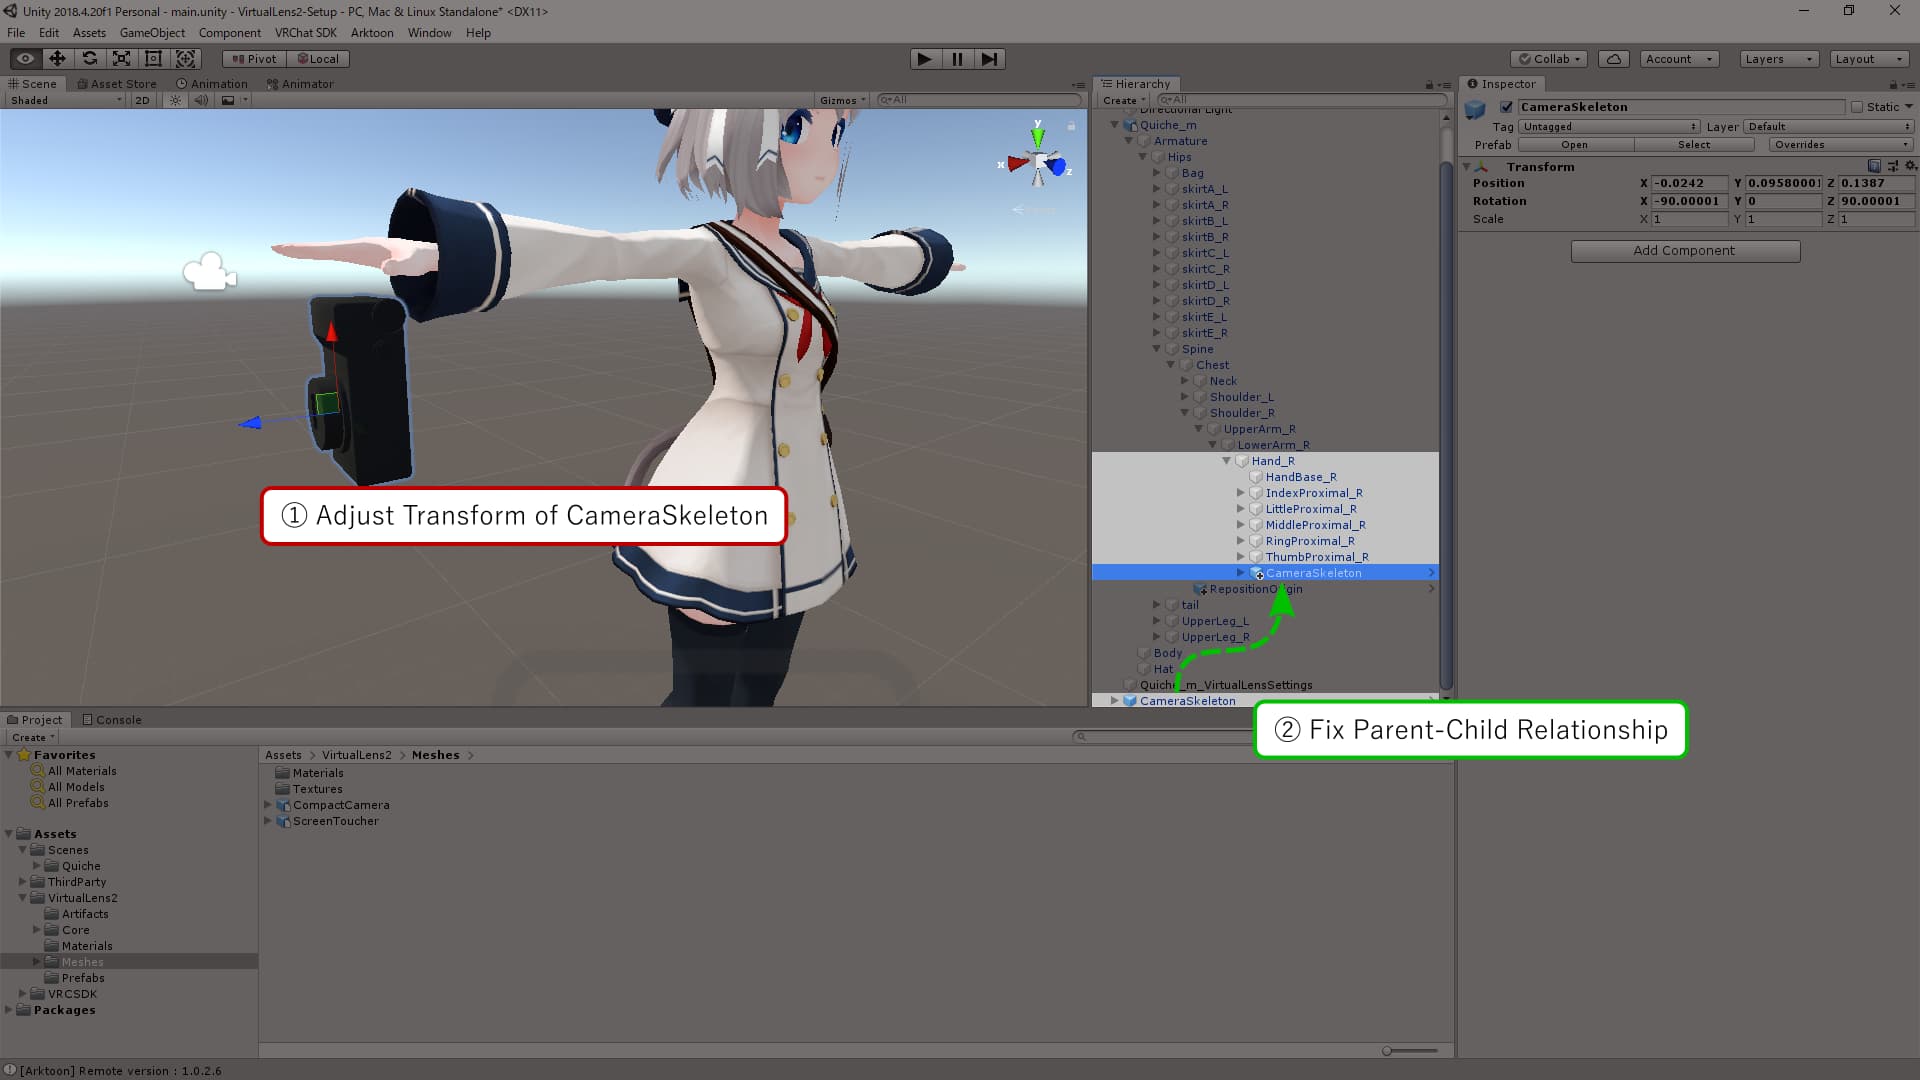
Modifying Parent-Child Relationships within the Avatar
After adjusting the position of CameraSkeleton, move it to be a child of the objects you want to interact with.
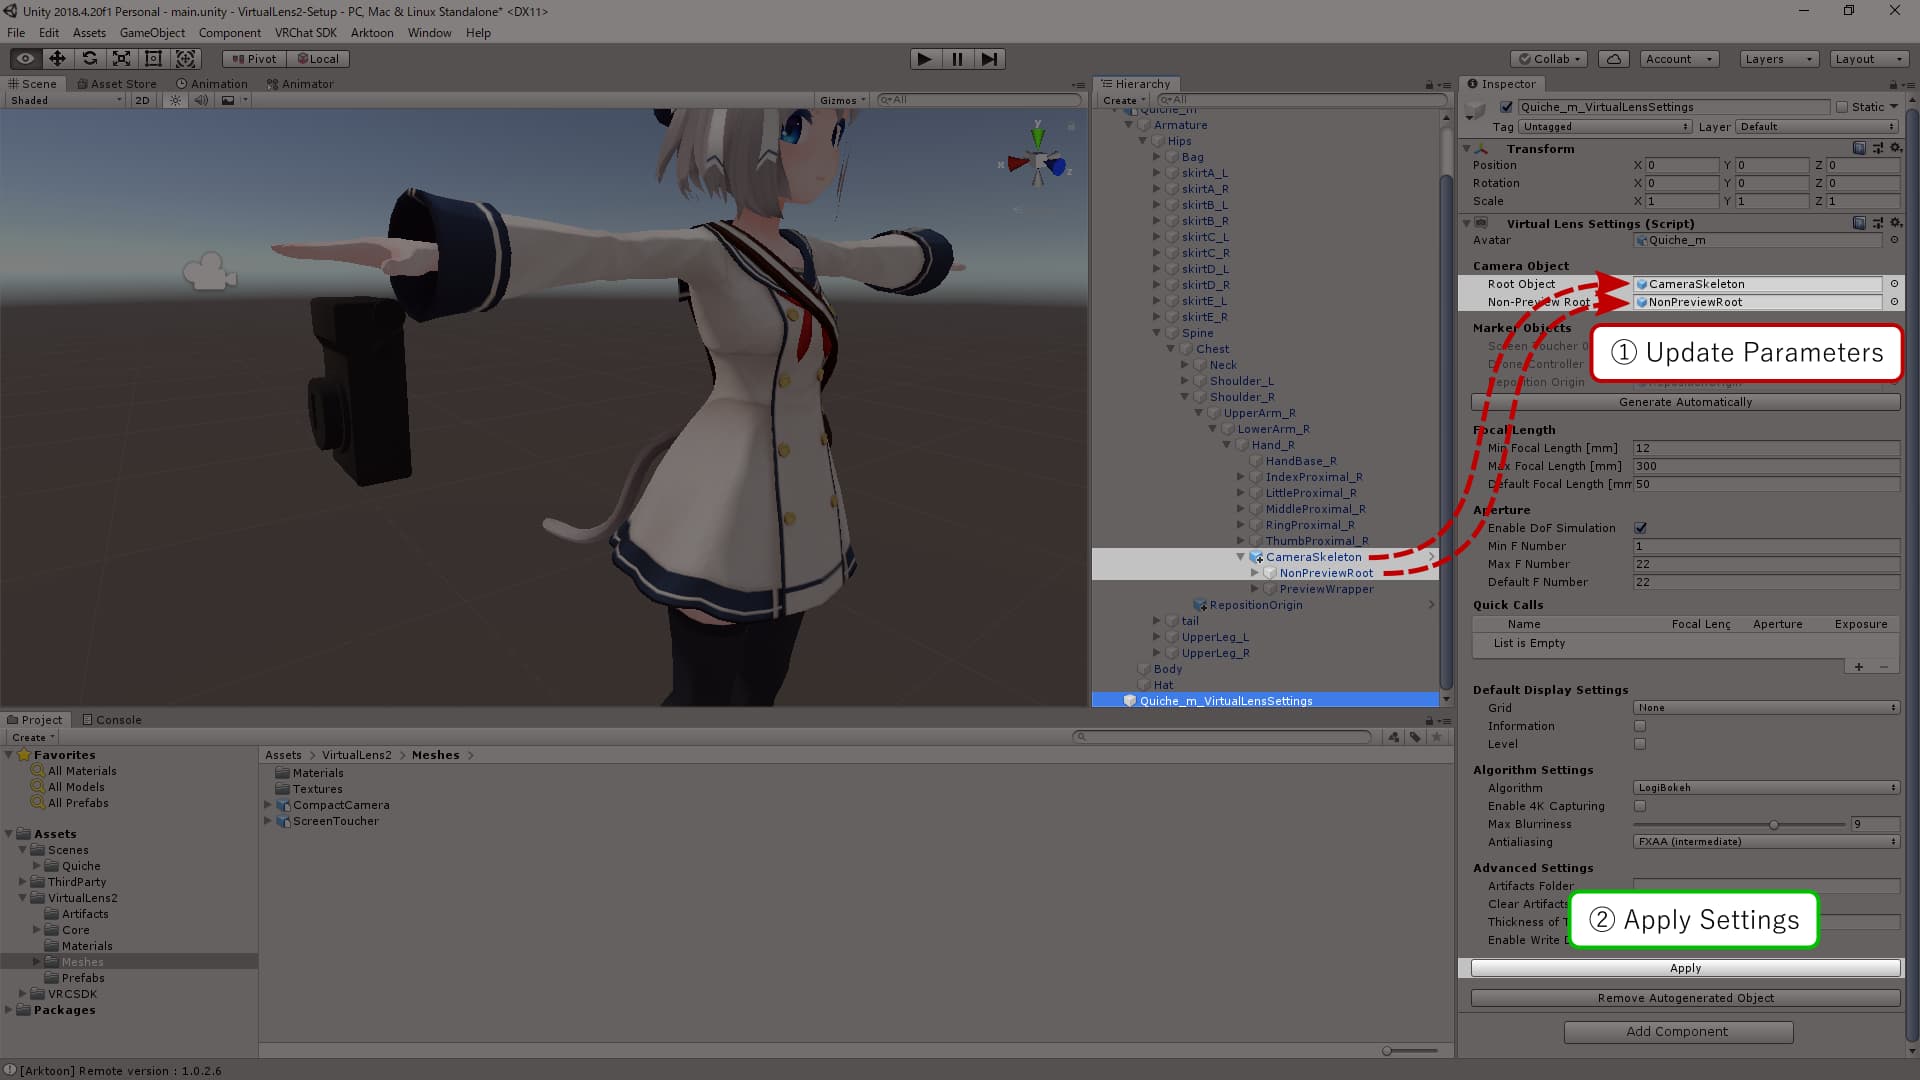
Updating Settings
Update the settings in VirtualLens Settings under the “Camera Object” section as follows, then press the “Apply” button to apply the settings:
Root Object:CameraSkeletonNon-Preview Root:NonPreviewRoot
Note that if you change the position of objects after applying the settings, you will need to press the “Apply” button again to update the settings.
Detailed Explanation
Reference Objects
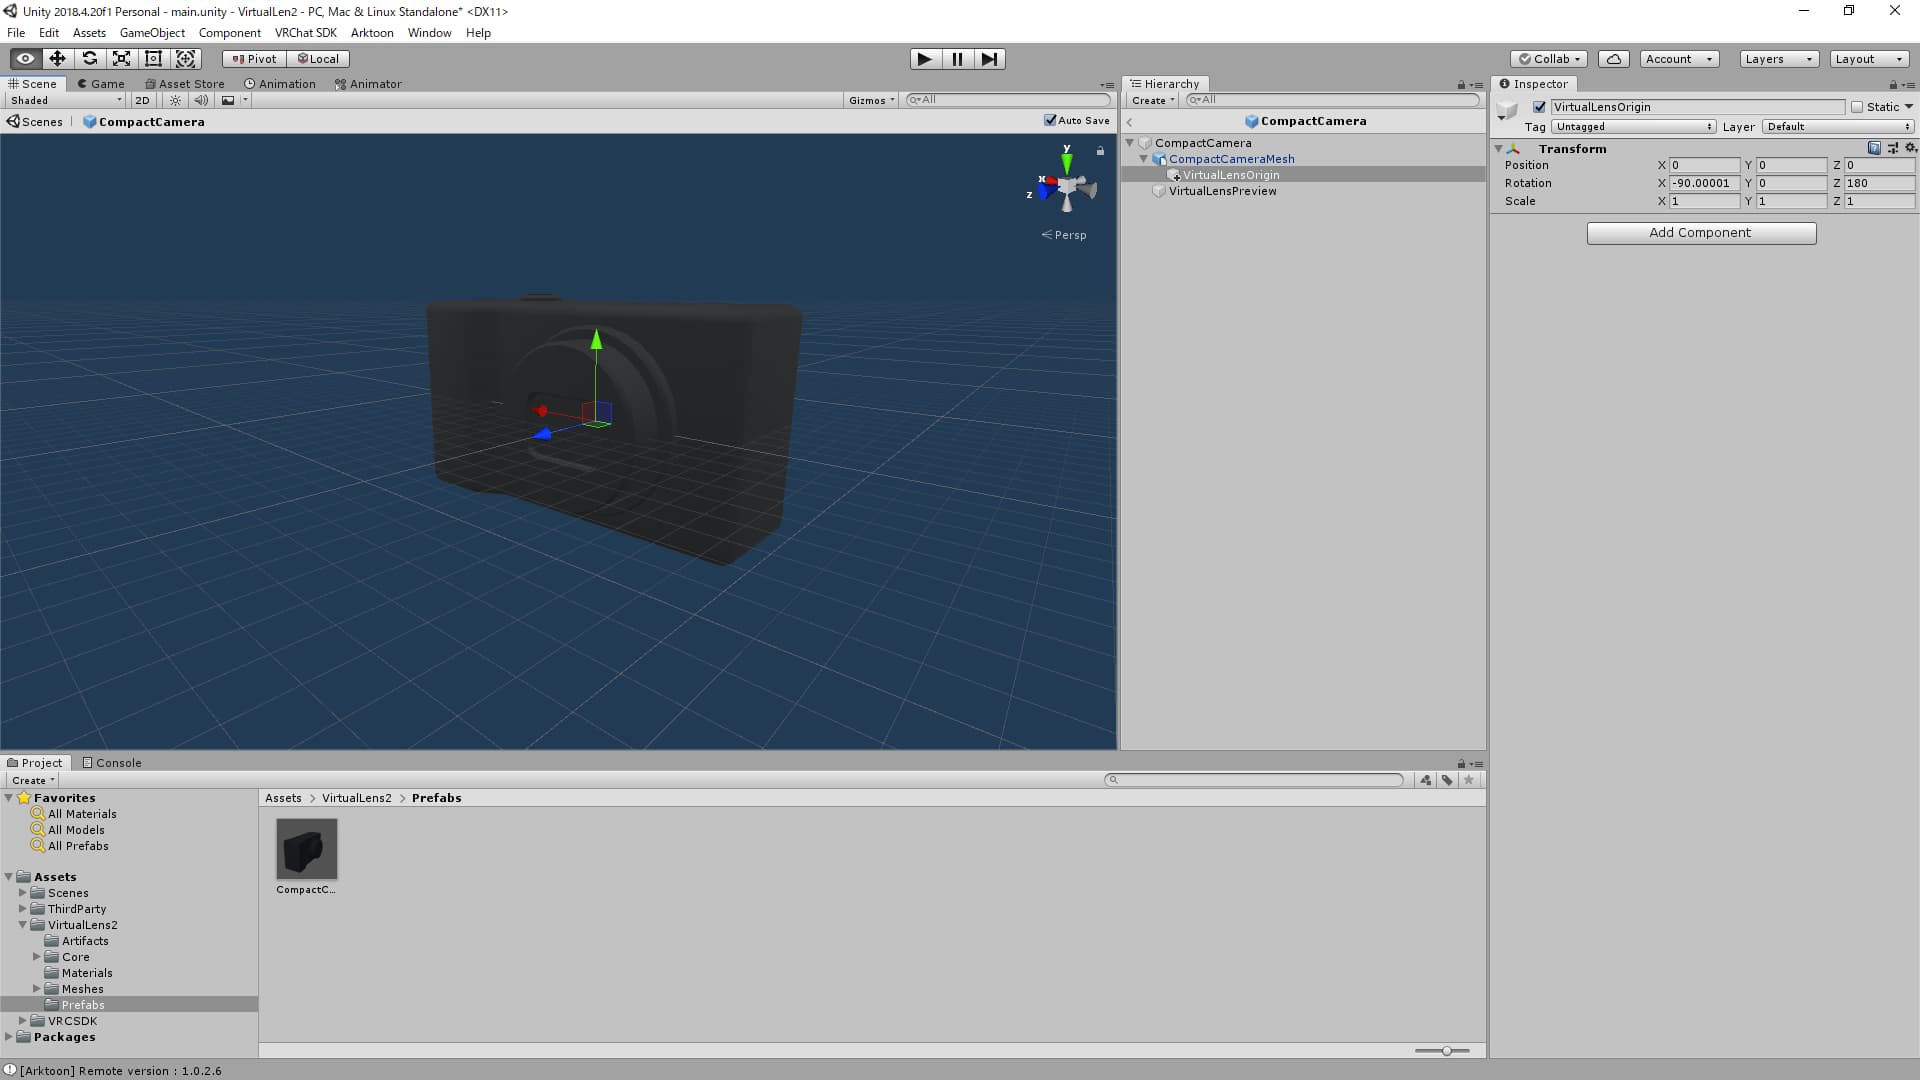
VirtualLens2 uses objects with specific names as references to automatically generate various components. By preparing these objects appropriately, you can use your custom 3D model as a camera. In this section, we will explain how to position reference objects using the camera model included with VirtualLens2 (Assets/VirtualLens2/Prefabs/CompactCamera.prefab) as an example.
VirtualLensOrigin
This object serves as the reference when placing the camera component for capturing. The positive Z-axis of this object represents the front, and the positive Y-axis represents the up direction. The camera component is generated based on this orientation.
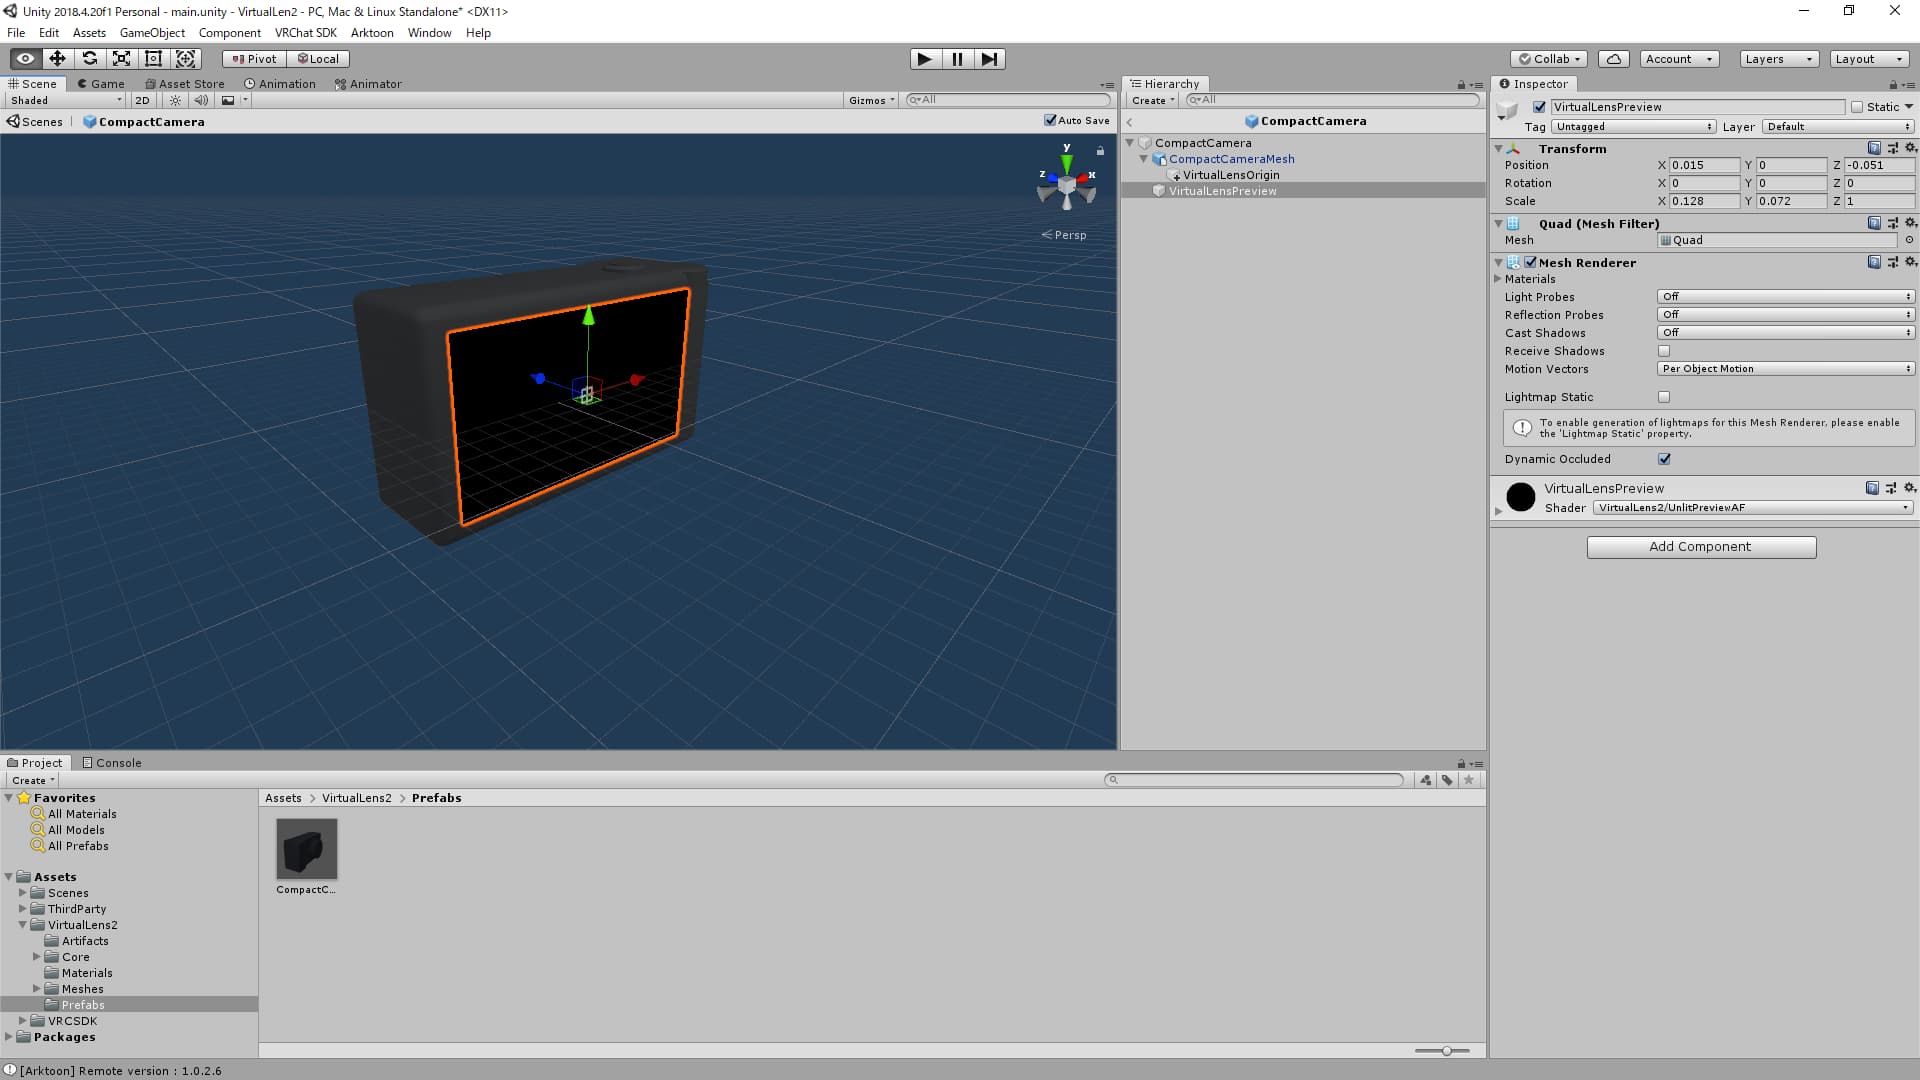
VirtualLensPreview
This object serves as the reference for interface placement to specify the focus point. The camera component for touch detection is generated based on the orientation and Y-axis scale of this object.
It’s worth noting that CompactCamera.prefab includes a MeshRenderer for the preview screen, but this is not mandatory. You have the option to render it on a different object or not render it at all.
Preview Material
A material for the preview screen is provided as Assets/VirtualLens2/Materials/VirtualLensPreview.mat. You can apply it to objects like a quad to generate a preview screen that includes touch information. You can find examples of its usage in the contents of the package, such as CompactCamera.prefab.
Distributing VirtualLens2-Compatible 3D Models
If you intend to distribute a 3D model designed for use with VirtualLens2, consider preparing a prefab that includes the reference objects mentioned earlier and uses the VirtualLensPreview.mat material for the preview screen. This will simplify the setup when integrating it with VirtualLens2. If you plan to distribute or sell your model, including such a prefab is a good idea.