Setup Guide
Requirement Check
Before setting up VirtualLens2, please ensure that the target avatar meets the following requirements:
- It is set up using VRCSDK 3.7.0 or later.
- Modular Avatar 1.8.0 or later is imported into the project.
- Expression Parameters have a margin of at least 8 bits.
Info
Starting from VirtualLens2 v2.10.0, the non-destructive workflow with Modular Avatar has become the standard setup procedure. If you cannot use Modular Avatar for some reason, you can use the traditional setup (destructive setup).Import Modular Avatar
Refer to the Modular Avatar documentation and import Modular Avatar into your project. If it’s already imported, make sure the version is 1.8.0 or later.
![]()
Import Unitypackage File
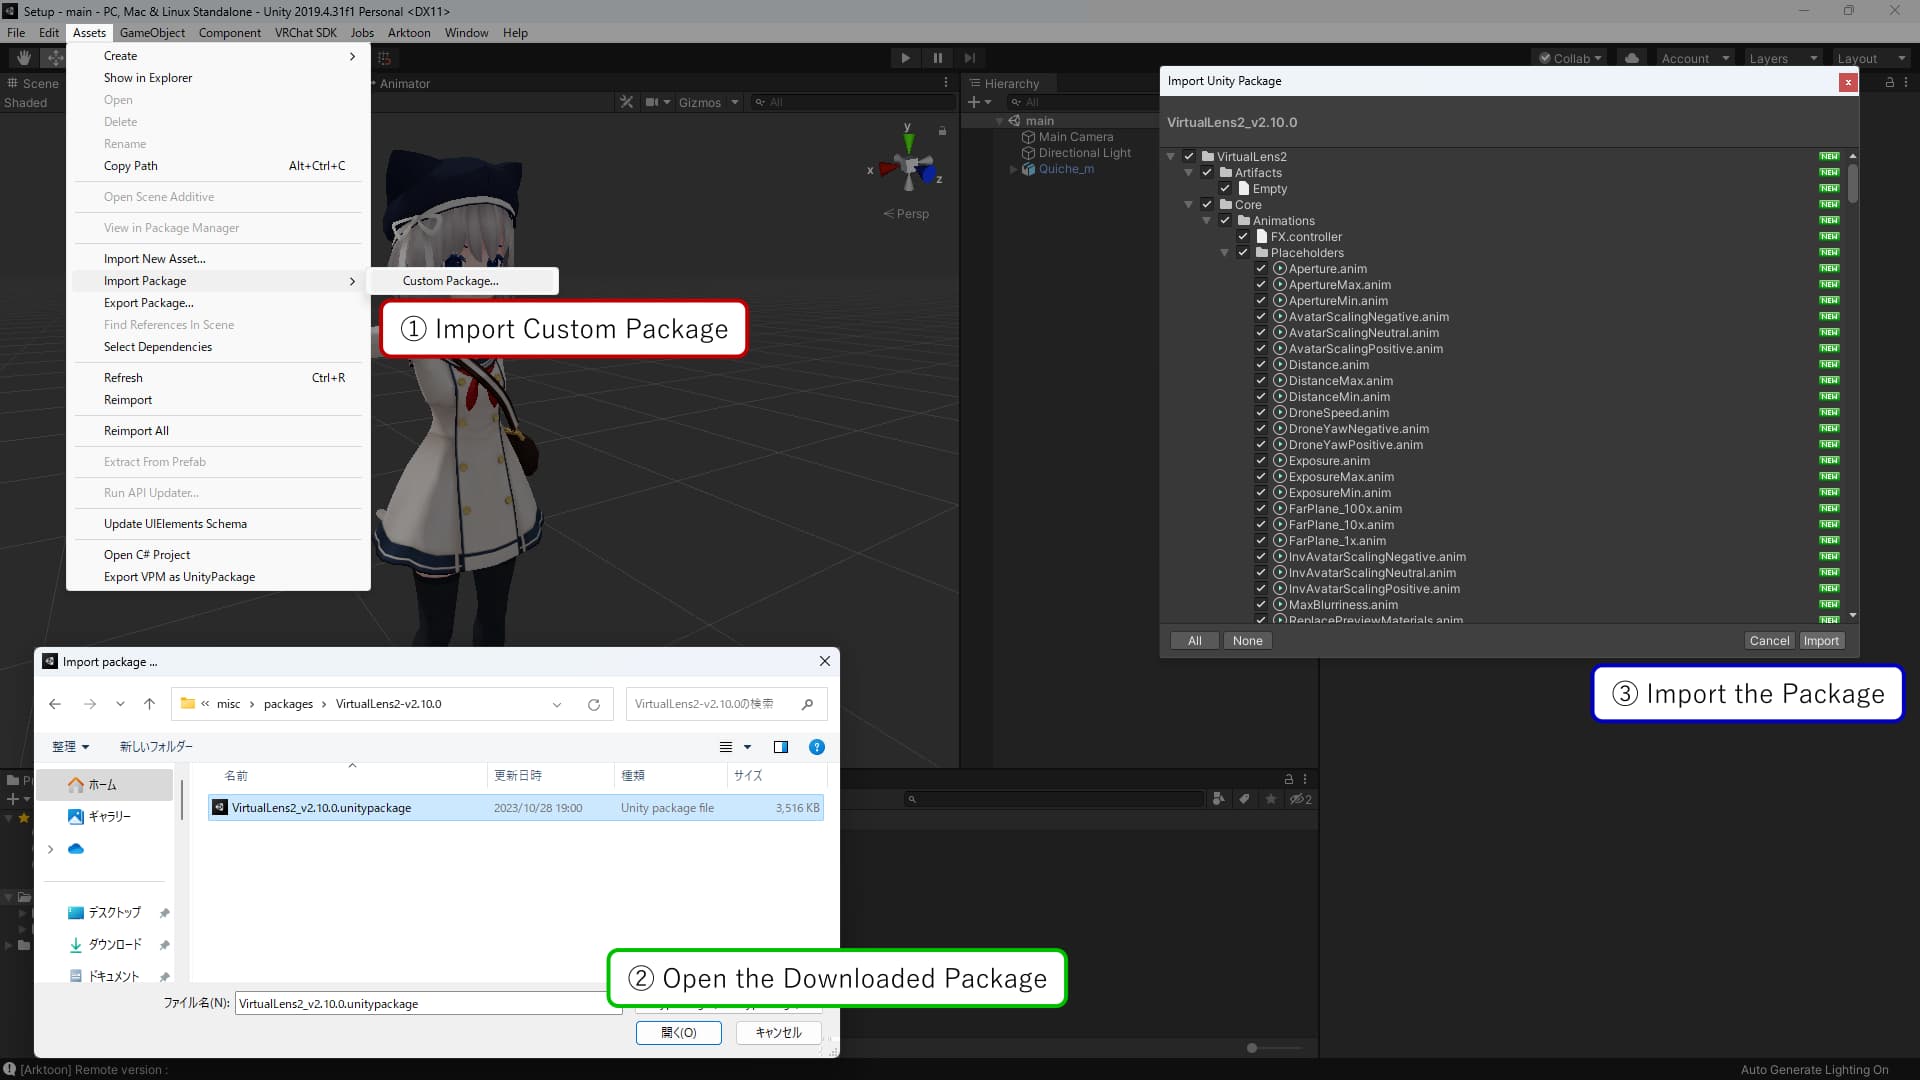
Import the downloaded package (VirtualLens2_v2.x.x.unitypackage) into your project.

Running Setup Helper
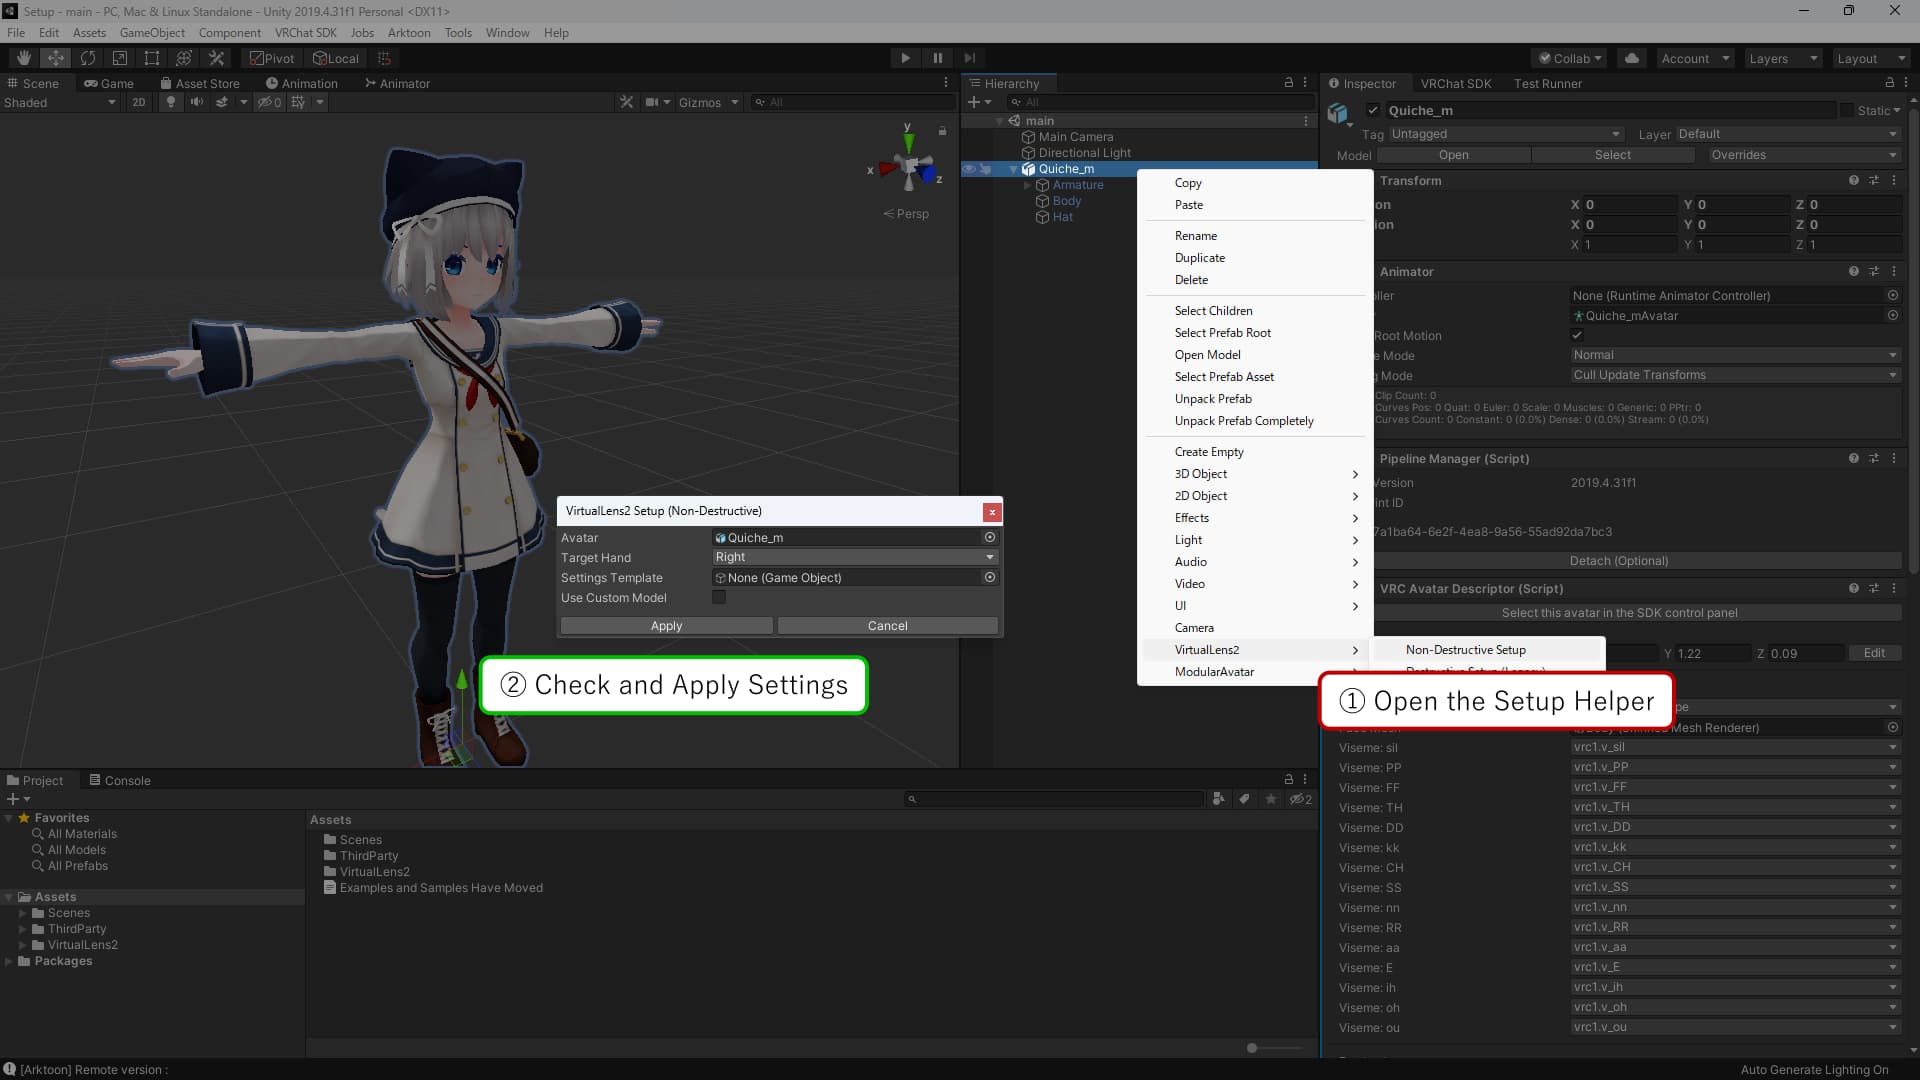
Select the avatar you want to set up, right-click, and choose “VirtualLens2” → “Non-Destructive Setup”. The setup helper will launch, so review the following settings and then press the “Apply” button.
| Avatar | The avatar you want to set up. |
|---|---|
| Target Hand | The hand that will hold the camera. |
| Settings Template | If set, it reads the configuration information from the VirtualLens Settings Prefab. (Optional) |
| Use Custom Model | Check this if you want to use a camera model other than the default. |
| Custom Model Prefab | Specify the Prefab for the camera model you want to place instead of the default model. If not set, the model placement will be skipped. |
| Keep Root Transform | Disables the automatic Transform adjustment feature when placing a custom model. |
Info
If the VRCSDK or Modular Avatar imported into the project is outdated, the menu items may not be displayed here. Please ensure that each package meets the requirements and update them as necessary.
Placing the Camera Model
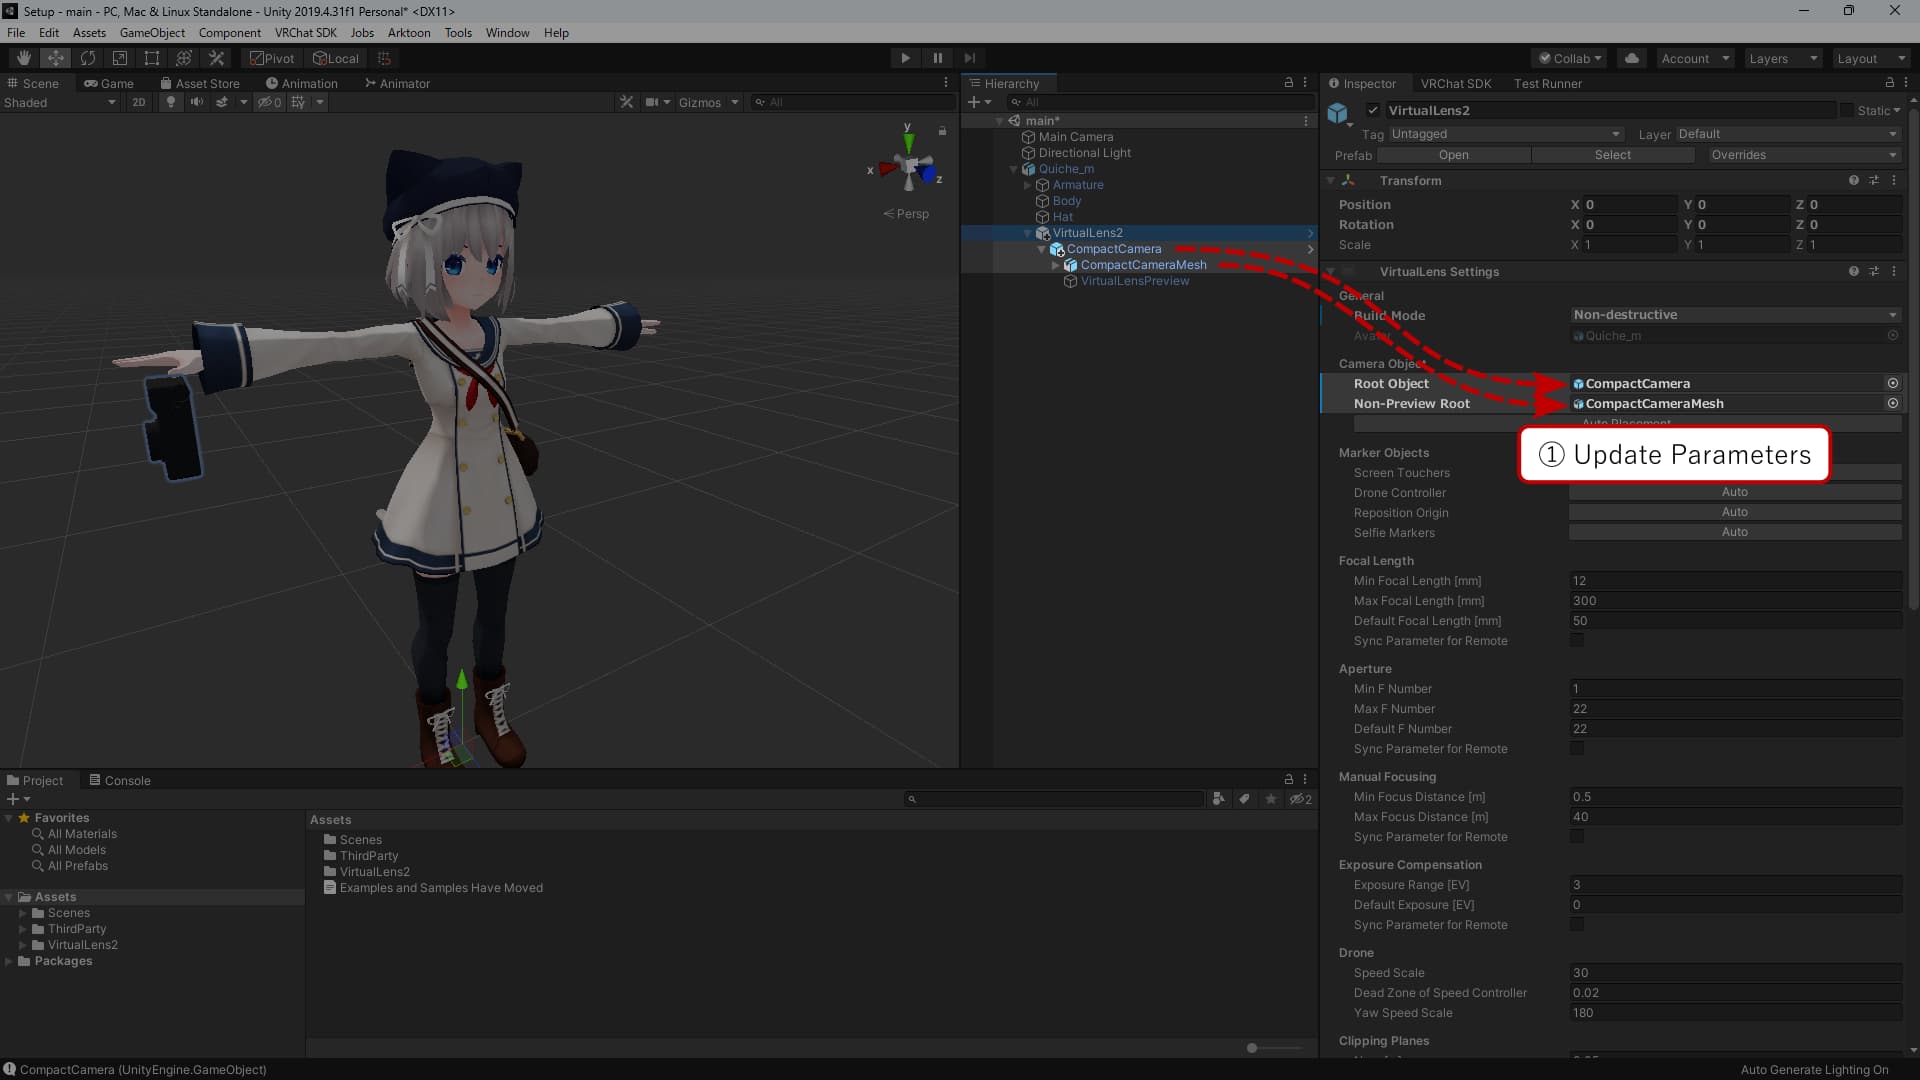
If the automatic placement of a camera model other than the default doesn’t work, you need to place the model manually. After adding the model to the scene, adjust its position and orientation. Move it to be a child of the bone you want the camera to follow. Additionally, you’ll need to enter information about the model into the VirtualLens Settings component. Refer to the image below and set the information below “Camera Object.”
Tips
If you find documentation for using a camera model with versions of VirtualLens2 prior to v2.5.5, adjust the items to set in “Optional Objects” to “Root Object” and those in “Droppable Objects” to “Non-Preview Root.”
Uploading the Avatar
Now the setup of VirtualLens2 is complete. Upload your avatar and try using it.
Tips
If you want to capture images at resolutions other than FHD (1080p), such as 4K (2160p), consider setting the “Default Resolution" under “Algorithm Settings” in VirtualLens Settings to your preferred resolution.
For more details, please refer to the [High-Resolution Mode](/en/docs/configuration/high-resolution/) page.